Monthly Archives: December 2012

Homemade Peppermint Patties

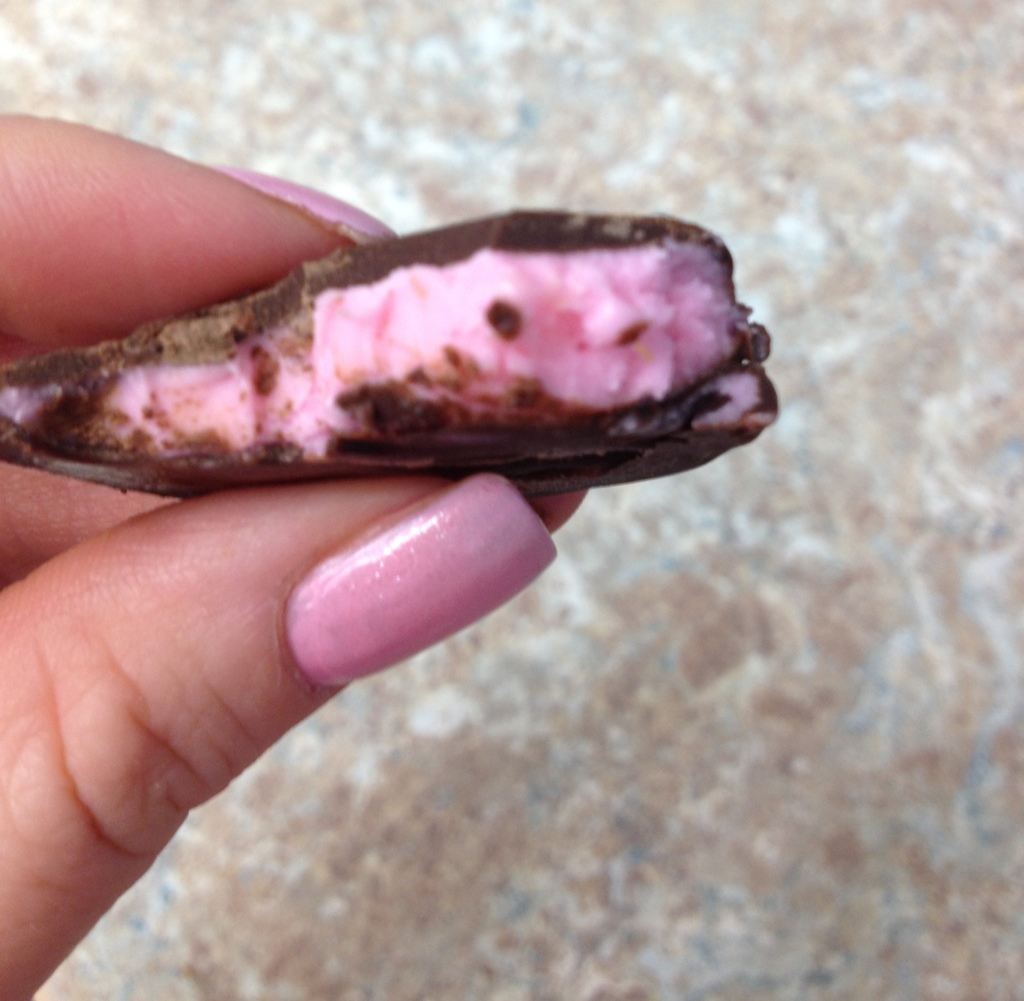
I made peppermint patties. As in the York type. I wouldn’t have thought it would be possible for them to taste as amazing as they did. After one bite my jaw dropped… and after the second bite (to make sure I wasn’t dreaming) I had to snap this photo and send it to my husband and brother.

20121228-153029.jpg

I’ve seen homemade peppermint pattie recipes before, but this one seemed so easy and quick that I decided it was time to give it a try.

Homemade Peppermint Pattiesadapted from Sweet Savory Life

Ingredients:

1 14oz can sweetened condensed milk

5 1/2 cups powdered sugar

1 tbsp peppermint extract

food coloring (optional)

24 oz semi-sweet chocolate chips or candy melts

Directions:

1. In a large bowl, mix together 2 cups of powdered sugar, the sweetened condensed milk, and the peppermint extract. Mix on medium speed until everything is incorporated.

20121228-094915.jpg

2. Add food coloring if desiered. Add remaining powdered sugar, 1/2 cup at a time, until all is incorporated. Candy mixture will be thick and sticky.

20121228-094922.jpg

3. Line a few baking sheets with wax paper and make room in the freezer. Prepare to get messy.

20121228-094935.jpg

4. With a spoon or spatula, grab a dollop of candy about 1″ in diameter. It’s going to be very very messy so just do the best you can with it. You want them to eventually be disks on the wax paper, about an 1″ or so apart. The original directions say to make a ball then press it flat on the wax paper. I found it was easier to plop the dollop on the wax paper, use my fingertips to push the edges into a round shape, then carefully pat down the top until it’s smooth.

20121228-100307.jpg

(Have you ever played with cornstarch/water goop as a child? It feels hard but then it always sinks down flat again.. This was kind of like that. It settles on it’s own, you just want to make sure it happens in a nice round shape.)

5. Once an entire pan is full, put it in the freezer for at least 30 minutes. I ended up with 3 trays full of these little pink patties.

20121228-095012.jpg

6. Melt chocolate chips or candy melts in the microwave in 30 second intervals, stirring after each time. Once smooth, remove a pan of peppermint patties from the freezer. Peel off one of the disks, coat it in chocolate, and lay it back on the pan to set up. I found it easier to dip these with my fingers. (They don’t freeze completely solid, so when I used a fork the pattie drooped over the edge of the fork while I was tapping off the excess chocolate.) It’s messy doing it with your fingers, which is why I didn’t get any photos of this step. I had no one else home with me to snap them!

The patties soften to room temperature quickly, so I could only dip about 6 at a time before I had to return the pan to the freezer and switch to another pan. During that time the chocolate coated ones hardened and could be removed to the fridge (or to my mouth).

The dipping was long and aggravating, but TRUST ME, I realized it was worth it once I bit into that first one!

20121228-152245.jpg

Store in the fridge or freezer. And be sure to share, this recipe makes a ton of these!

Advertisement

6 Comments

Filed under Candy

Chocolate Cookie Dough Cheesecake

Merry Christmas (Eve) friends!

Bringing this to my parents’ house for our Christmas Eve dinner. Needed something decadent because my family loves rich, heavy desserts.

I guess I am into chocolate chip cookie dough lately. I can’t help it, the stuff is so addicting! And way too easy to slap together.

20121224-211436.jpg

Chocolate Cookie Dough Cheesecake

Cookie Dough Ingredients:

1 cup (2 sticks) butter, room temperature

3/4 cup granulated sugar

3/4 cup packed brown sugar

2 tsp vanilla

scant 1/3 cup milk (little less than 1/3 cup)

2 1/2 cups all purpose flour

1 tsp salt

1/4 tsp baking soda

1 cup semi-sweet chocolate chips (I used reg size but mini would work!)

Chocolate Cheesecake Ingredients: (adapted recipe from taste of home)

-For the crust-

1 1/3 cups crushed chocolate chip cookies (I used crunchy Chips Ahoy)

1/4 cup sugar

1/2 stick (4 tbsp) butter, melted

-For the filling-

2 cups semi-sweet chocolate chips

2 (8oz) packages 1/3 less fat cream cheese

3/4 cup sugar

2 tbsp flour

2 eggs, lightly beaten

2 tsp vanilla

whipped cream and/or chocolate drizzle for serving (optional)

Cookie Dough Directions:

1. Beat together butter and sugars until combined. Add vanilla and milk and beat, scraping if necessary. Whisk together flour, salt, and baking soda. Slowly add flour to wet mixture until completely combined. Stir in chocolate chips by hand.

2. Chill dough for about an hour to make dough easier to handle. Roll into 1″ sized dough balls, and place on a waxed paper lined cookie sheet. Place the whole pan in the freezer until balls are frozen solid.

**At this point the balls can be moved to a zip top bag and saved for later use. I actually used dough balls that had been in my freezer waiting for something spectacular to become a part of. Just make sure your roommates know not to eat them!**

20121223-193105.jpg

3. You will only need about 25-30 cookie dough balls for this cheesecake. Cut frozen cookie dough balls into quarters, and place back in the freezer until ready for use. (Keeping the dough absolutely frozen until baking will ensure it doesn’t bake into cookies instead of staying cookie dough.)

20121223-193155.jpg

Cheesecake Directions:

1. Preheat oven to 350*F. Spray 9″ springform pan with non-stick spray if necessary.

2. In a small bowl, combine cookie crumbs, sugar, and melted butter. Press into bottom and halfway up the sides of the pan. Set aside.

20121223-193121.jpg

3. Microwave chocolate chips in 30 second intervals, stirring until smooth. Let cool slightly.

4. Beat the cream cheese, sugar, and flour in a large bowl until smooth. Add eggs and beat until just combined. Stir in vanilla then melted chocolate by hand. Be careful not to overbeat – overbeating will cause the cheesecake to crack while cooking.

20121223-193127.jpg

5. Carefully fold frozen cookie dough chunks into cream cheese mixture. Pour into prepared crust and smooth out the top as best as possible.

(Sorry, forgot to take a photo here, I was anxious to get it in the oven!)

6. Bake for 40-45 minutes or until top looks dry and center is almost set.

7. Cool on wire rack for 10 minutes. Run a knife around the edge of the cake to loosen from the pan. Let cool completely, then cover with plastic wrap and refrigerate overnight.

20121224-211425.jpg

8. Remove from fridge 1-2 hours before serving. Remove springform ring and place on a cake plate or large platter. Top with whipped cream or chocolate drizzle if desired.

20121224-211432.jpg

20121224-211440.jpg This dessert was SO rich that most of us couldn’t finish a slice. I should have cut it into smaller slices! It’s super moist and creamy, and the cookie dough is just heavenly tucked away in the rich chocolate.

Hope everyone has a fantastic Christmas!

2 Comments

Filed under Cakes

Santa Cookies

The cutter I used to make these Santa’s was a hand-me-down from my mom. It was one that we didn’t always use because the small parts always seemed to break off.

Now that I am rolling my cookies a tad thicker, I knew it would hold up well.

This is what I came up with…

20121221-221335.jpg

(Click on the picture above to see a larger image.)

I did the first one with an edible food marker on the blank cookie to get my design right. After that they were just free handed.

20121221-221341.jpg

I love how each one has a little bit different personality!

20121221-221347.jpg

I actually meant these guys to have a black belt across the belly, but I was too quick to clean (for once) and had thrown out all my black buttercream. Oh well, I like em anyway!

6 Comments

Filed under Cookies

Fudgey Brownies with Chocolate Chip Cookie Dough Frosting

That might be my longest titled treat yet.

Don’t worry, it’s worth it.

Just as a disclaimer, the cookie dough frosting does not have eggs in it – so while it tastes just like raw cookie dough, it won’t kill you. At least not from salmonella. I can’t promise it won’t if you eat the entire bowl of it with a spoon. That’d be a good way to go though, I must say…

20121219-121025.jpg

Fudgey Brownies with Chocolate Chip Cookie Dough Frosting

Brownie Ingredients:

2 1/2 sticks unsalted butter (1 1/4 cups)

2 1/2 cups granulated sugar

2 tsp vanilla

4 eggs

1 cup flour

1 3/4 cups cocoa powder

1/2 tsp salt (omit if using salted butter)

Chocolate Chip Cookie Dough Frosting Ingredients:

1 1/2 sticks unsalted butter

3/4 cup brown sugar

1/3 cup granulated sugar

2 tsp vanilla

1/2 tsp salt

scant 1/2 tsp baking soda

1 1/2 cups flour

about 2 tbsp milk

3/4 cup mini semi-sweet chocolate chips

Directions:

1. Preheat oven to 325*. Spray 13×9 pan with non-stick cooking spray.

2. Melt butter, then beat with sugar until mixed well. Beat in eggs and vanilla.

3. In a separate bowl, whisk together flour, cocoa powder, and salt. Slowly add to sugar mixture until mostly incorporated. Batter will be thick.

4. Pour into prepared pan and smooth out as much as possible.

5. Bake for 30 minutes (toothpick inserted into center should be mostly clean). Let cool at least 20 minutes.

**While brownies are baking, make the frosting.**

20121219-120950.jpg

6. Beat together sugars and butter. Add vanilla, then salt and baking soda. Add flour 1/2 cup at a time, alternating with a little of the milk to keep it from getting too thick. Add more milk at the end if necessary to bring it to a thin enough consistency. Mix in the mini chocolate chips by hand.

20121219-120955.jpg

7. When the brownies are cooled, spread the cookie dough frosting evenly across the top with an offset spatula.

20121219-120959.jpg

8. Cover and refrigerate overnight.

20121219-121004.jpg

9. The next morning, cut the brownies into small pieces. It was easier for me to cut one whole row, then move it to my cutting board to cut into small pieces.

20121219-121020.jpg

10. Try not to eat the entire pan.

20121219-121030.jpg

This is basically the same brownie recipe I used for my Dark Chocolate Peppermint Brownies. It’s fudgey and dense, and just rich enough to hold up the cookie dough well.

From the words of one of my coworkers, these are “amazeballs.” For the record, it’s the first time I’ve ever heard him say that word.

6 Comments

Filed under Brownies

Christmas Cookies

I have been too busy to write up all the things I wanted to do, so here are just a couple pictures to tide you over until I have more to share. Merry Christmas!

20121218-111558.jpg

20121218-111603.jpg

20121218-111615.jpg

Hope your kitchen has been as cheery and busy as mine!

3 Comments

Filed under Cookies

Gingerbread House Decorating Party

Growing up, I got to decorate a gingerbread house ever single year. My grandmother spent hours and hours baking the house pieces so that my cousins, my brother, and I could enjoy the tradition. She made real gingerbread and real royal icing with egg whites. We took pictures with our houses every year and it’s so fun to flip through them all!

Now that I am grown up, I knew it was my turn to start my own tradition. I found Wilton gingerbread house cutters at Michaels. I baked chocolate cookies (my friends and I are not fans of actual gingerbread) and I made royal icing for the first time. We all brought lots of candy and went to town!

Here is my finished house:

20121209-154615.jpg

20121209-154629.jpg

20121209-154620.jpg

20121209-154635.jpg

20121209-154640.jpg

Here are the houses my girlfriends made…

I just love the way Chelsea did her roof!

20121209-154650.jpg

Michelle got so creative with her Santa and elves on one side, and a snowman on the other side.

20121209-154700.jpg

Here is my brother’s girlfriends’ house. Her grinch is so cute!!

532031_10151304453034863_1937177937_n

The chocolate cookies held up perfectly against the weight of the rest of the house plus all the frosting and candy.  And my first time making royal icing was a success, woo hoo! I do think I overbeat it, but it still hardened well and held up against the weight. Thanks everyone for the encouragement!

6 Comments

Filed under Cookies, Misc

Pastel Ornament Cookies

The only ornament cutters I own are very small. I wanted a big, round, ornament cookie to decorate this year. I used my balloon cutter, and just trimmed off the pointy ends.

20121209-160640.jpg

Inspired by these gorgeous cookies by Sweetopia, I chose to do pastel colors instead of the traditional red and green.

20121209-152633.jpg

The tops of the ornaments just had to be silver.

I first piped them in grey, then I mixed together alcohol and silver lustre dust and painted it over the grey with a food safe paint brush. (Lemon juice can also be used in place of alcohol if there is a concern, but it all evaporates anyway.)

20121209-152654.jpg

20121209-152649.jpg

Though I only made a few of these, I enjoyed making each one unique!

20121209-152637.jpg

3 Comments

Filed under Cookies

Simple Snowman Cookies

I kept these snowmen super simple. I love the black and white simplicity of them.

20121207-083432.jpg

I outlined the hat in black buttercream, and each round section in white buttercream. (Here is my Easy Buttercream recipe.) Then I just filled each section in separately, and added some black buttercream buttons to the tummy.

Easy peezy!

20121207-083437.jpg

These cookies are the first I have done with my new rolling technique. They’re a tad thicker than I normally do, but still thin enough that the icing is a good proportion to the cookie. All the yum without the breakage!

Next batch I bake I will take photos and share my new technique with you!

3 Comments

Filed under Cookies

Chocolate Snowflakes

These chocolate peanut butter cookies are decorated with all white vanilla buttercream. I just love the way the designs pop against the dark cookie!

20121204-220504.jpg

I decorated each snowflake with a unique design.

20121204-220514.jpg

I thought I would run out of ideas, but I just kept making them up as I went along.. my husband helped design a couple. (The bottom left snowflake in the pic above was partly his design.)

20121204-220509.jpg

These are my personal favorites:

20121204-220521.jpg

They even look cute all together…

20121204-220526.jpg

Here is my buttercream recipe. It’s very easy and adaptable and perfect to top any cookie!

14 Comments

Filed under Cookies

Elf Munchies

This snack munch is easy and pretty and sure to impress!

20121203-100409.jpg

Elf Munchies

Ingredients:

About 8 cups of popcorn (1/2 cup of kernels if popping them fresh)

12 oz white chocolate chips, almond bark, or white candy melts

Assorted sprinkles

Directions:

20121203-094152.jpg

1. Pop some popcorn. You can use microwave popcorn if you want, I just don’t know how it will taste if you get the buttery kind. I used white popcorn and popped it the same way I make my Kettle Corn, but without the sugar. Let it cool.

20121203-094146.jpg

2. Melt white chocolate chips, almond bark, or white candy melts until smooth. Pour over popcorn and stir until evenly coated. I added sprinkles while my husband was stirring. Non-pareils, jimmies, and quins!

20121203-094157.jpg

3. Spread popcorn out on wax paper. I broke it up so that there were no large clumps.

20121203-094208.jpg

4. In freezer zip top bags, melt green and red candy melts. (I like to use leftover candy melts for this because it doesn’t have to melt perfectly smooth to be pretty as drizzle!) Massage bag until smooth. Snip the corner of the bag and drizzle the candy over the white chocolate coated popcorn. I finished off with some more sprinkles – snowflakes this time!

20121203-094204.jpg

5. Wait for the candy to set up completely, then break up popcorn and store in a airtight container or zip top bag.

This would be so cute to leave out with cookies for Santa. The elves deserve some treats too!

20121203-094222.jpg

20121203-094226.jpg

5 Comments

Filed under Candy, Misc