Category Archives: Candy

Chocolate White Chocolate Macadamia Nut Cookie Dough Truffles

What a mouthful!!

You’ll forgive the ridiculous name once you try these. I promise.

I’ve made Chocolate Chip Cookie Dough Truffles, Funfetti Cookie Dough Truffles, and M&M Cookie Dough Truffles.

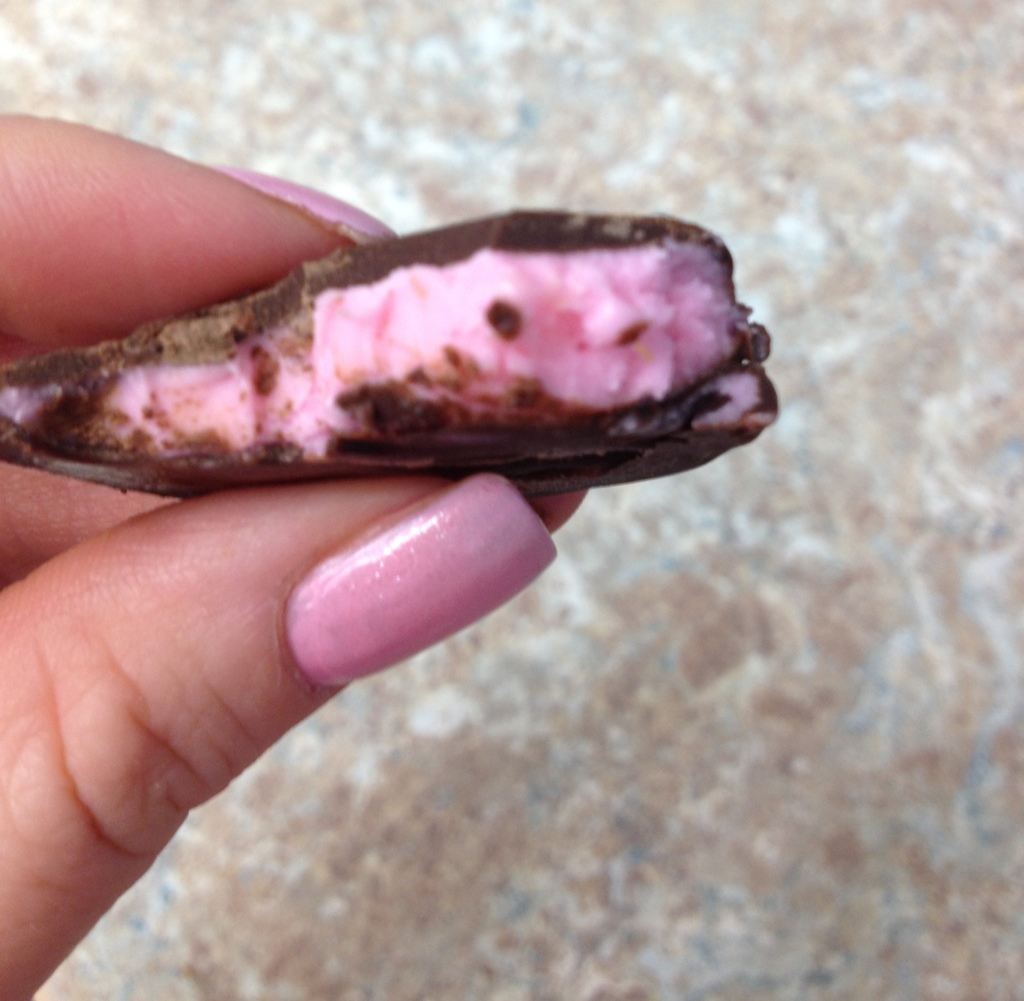
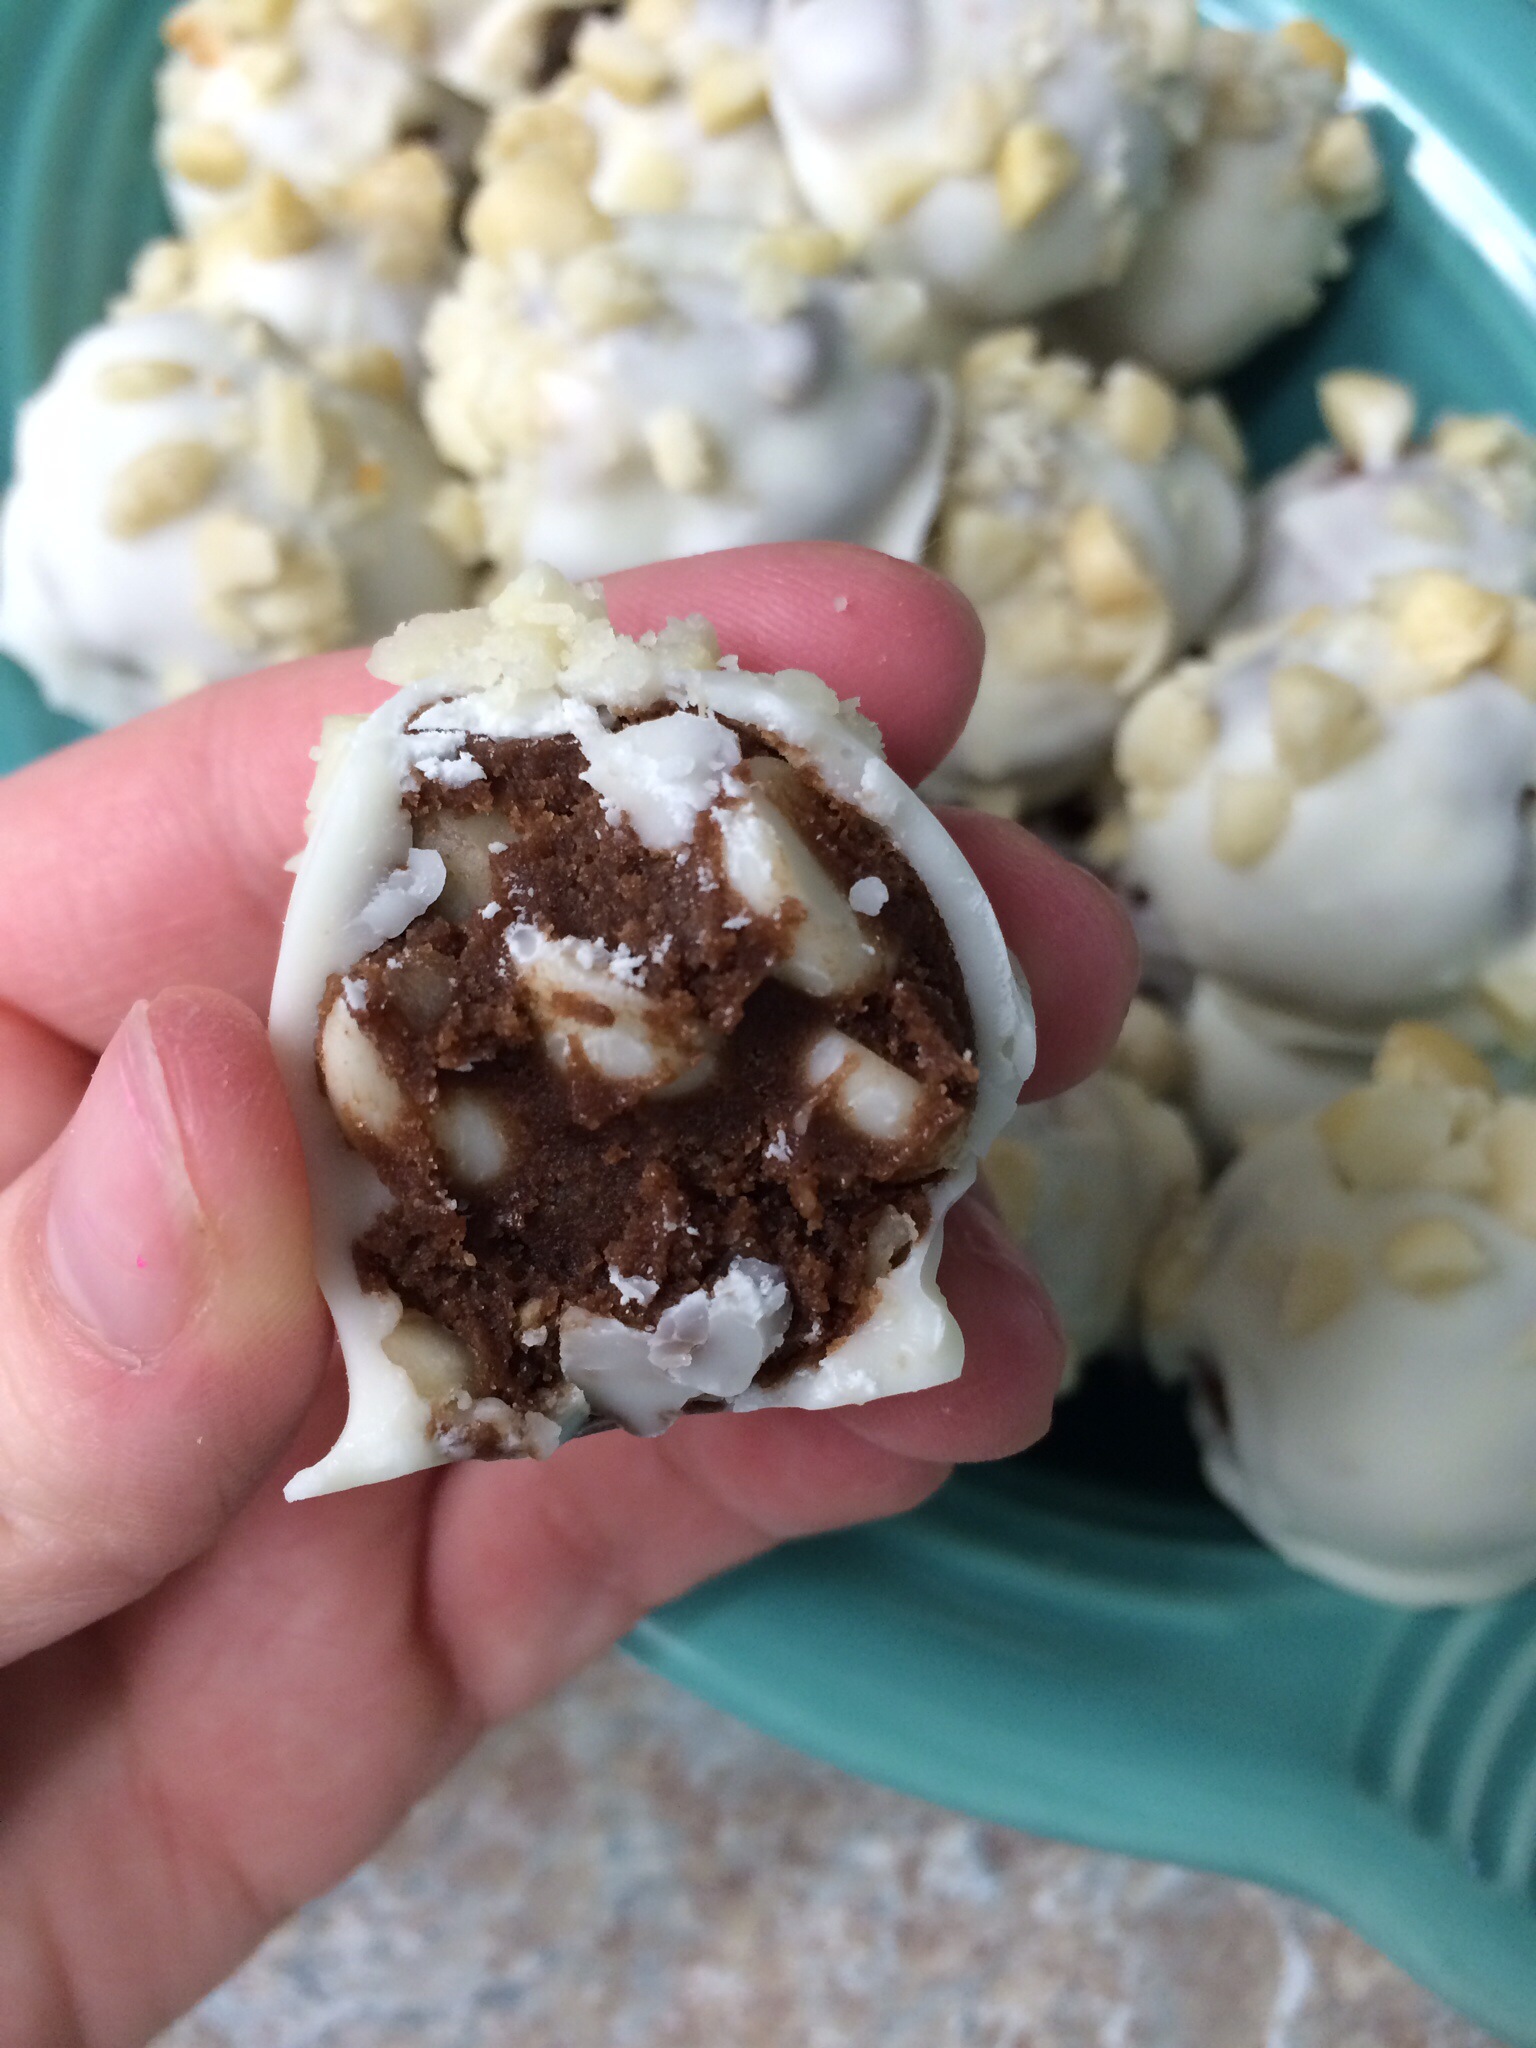
These are a twist on the common white chocolate macadamia nut cookies… Which happen to be my husband’s favorite cookie of all time. His birthday was a couple weeks ago so I made these for him. They’re lumpy and not the prettiest, but OH SO GOOD.

20140404-192404.jpg

Chocolate White Chocolate Macadamia Nut Cookie Dough Truffles

Ingredients:
1 cup sugar
1 cup packed brown sugar
2 sticks butter (1 cup)
6 tbsp milk (or milk substitute)
2 tbsp vanilla
2 1/4 cup flour
1/2 cup cocoa
1/4 tsp baking soda
1 tsp salt
2 cups white chocolate chips
1 cup chopped macadamia nuts, divided
Candy coating (I used CandiQuik)

Directions:
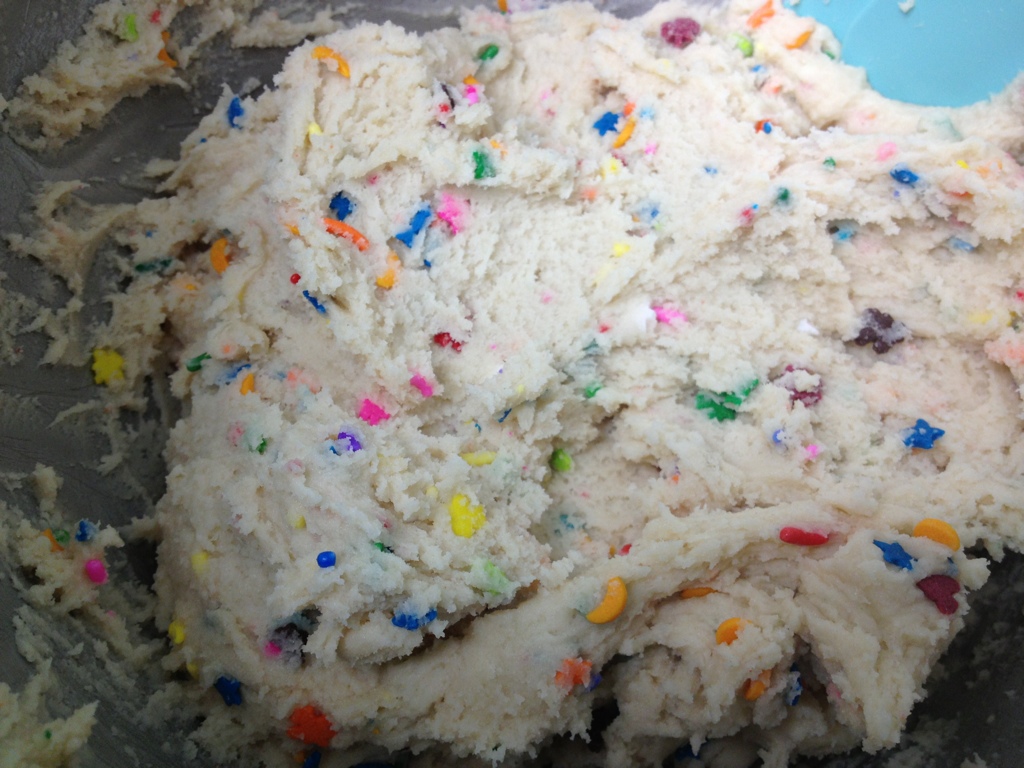
1. Beat butter and sugars. Add vanilla and milk.
2. In a separate bowl, whisk together the flour, cocoa, salt, and baking soda. Slowly add to wet mixture.
3. Stir in chips and nuts by hand.
4. Let dough chill for at least 2 hours.
5. Scoop into small balls on a waxed lined baking sheet and place in freezer to harden up. I did this the night before.
6. Melt the candy coating and dip each ball, tapping off the excess with a fork. Quickly top with chopped nuts.
7. Store in the fridge.

20140404-192412.jpg

Even though I made these for my husband, I actually took most of them to work. We don’t need THAT much sweets around the house! There was a good portion of cookie dough left that hadn’t been dipped so I let him finish that off. 🙂

My coworkers LOVED these. One even proclaimed that if he could have any dessert ever in the world that he would choose these. Maybe it was because he was currently holding one, I don’t know… 🙂

I liked them because they weren’t overly chocolatey.. you know, because I don’t like chocolate all that much. But they were still chocolatey enough for the major chocolate lovers too!

Advertisement

3 Comments

Filed under Candy, Misc

Funfetti Cookie Dough Truffles

I guess it turned out to be funfetti week. 🙂

I have made Cookie Dough Truffles once before, here. Instead of chocolate chip cookie dough, this time I went with funfetti.

This idea is really not new. You might have seen this on Pinterest. Something similar was also done by Hayley. And a slightly different recipe can be found here by Shugary Sweets.

Since all the recipes are slightly different, and I just recently made funfetti cookies, I decided to adapt my own recipe to be “egg free” aka pregnant lady friendly.

Speaking of pregnant lady, have you seen my new sidebar pic?! I’m going to try to keep it updated as I go now so you can all see whyyyy I am not posting very often.

Anyway, back to these cookie dough truffles.

20130709-204430.jpg

Funfetti Cookie Dough Truffles

Ingredients:

1 1/2 sticks salted butter (3/4 cup)

1 cup sugar

6 tbsp milk

2 tsp vanilla

1 tsp baking powder

scant 1/2 tsp salt

2 cups flour

1 cup dry funfetti cake mix

4 tbsp any kind of sprinkles

Directions:

1. Beat together butter and sugar. Add milk and vanilla, scraping beater as needed.

2. Add baking powder and salt, then slowly add flour then funfetti mix.

3. Add more sprinkles. I used a few different random packets of Karen’s Cookies sprinkles. I had been saving them up and this was the perfect opportunity to utilize them!

20130709-204354.jpg

4. Line a cookie sheet with wax paper. Roll dough into tablespoon sized balls and lay on cookie sheet. Freeze until firm.

20130709-204359.jpg

5. Melt candy melts in microwave. Using a fork, dip the balls into the candy and tap off any excess.

20130709-204529.jpg

Return to the cookie sheet and sprinkle the top with more sprinkles.

20130709-204424.jpg

6. Store in refrigerator.

20130709-204434.jpg

My brother would absolutely LOVE these!!

8 Comments

Filed under Candy, Misc

Red Hot Cinnamon Popcorn

This wasn’t the most successful idea I’ve ever had, but it still worked so I wanted to share!

I made red hot cinnamon flavored kettle corn.

I mixed together oil, oil flavoring (cinnamon) and oil candy coloring in a large pot. Set it on high and dropped a few popcorn kernels into the oil.

20130419-142803.jpg

Normally, when the oil gets hot he popcorn kernels pop and then we add the rest of the popcorn… That’s still what I did, but it was smoking like crazy the whole time. Once the kernels popped I dumped in the sugar and rest of the kernels, stirred as much as possible, and put a lid on it to begin shaking. It was smoking so much I had to crack the lid a few times to let the smoke out, but the kernels were still popping so I kept going.

Once the popping slowed, I pulled off the lid and dumped the popcorn on some wax paper across the countertop. Surprisingly, nothing was burned! And it was a pretty pink color from the red coloring I added.

20130419-142811.jpg

Now for the taste… At first it just tasted like kettle corn but without the salt. Then I kept eating… And the cinnamon snuck up on me ad I could feel it slightly burning my tongue!

20130419-142816.jpg

The smoking was weird, not sure if t was from the flavoring or the coloring added to the oil, but I’d say overall it was a success! I was scared to add too much cinnamon oil, but it was so subtle that I think I will double it next time!

2 Comments

Filed under Candy

Homemade Peppermint Patties

I made peppermint patties. As in the York type. I wouldn’t have thought it would be possible for them to taste as amazing as they did. After one bite my jaw dropped… and after the second bite (to make sure I wasn’t dreaming) I had to snap this photo and send it to my husband and brother.

20121228-153029.jpg

I’ve seen homemade peppermint pattie recipes before, but this one seemed so easy and quick that I decided it was time to give it a try.

Homemade Peppermint Pattiesadapted from Sweet Savory Life

Ingredients:

1 14oz can sweetened condensed milk

5 1/2 cups powdered sugar

1 tbsp peppermint extract

food coloring (optional)

24 oz semi-sweet chocolate chips or candy melts

Directions:

1. In a large bowl, mix together 2 cups of powdered sugar, the sweetened condensed milk, and the peppermint extract. Mix on medium speed until everything is incorporated.

20121228-094915.jpg

2. Add food coloring if desiered. Add remaining powdered sugar, 1/2 cup at a time, until all is incorporated. Candy mixture will be thick and sticky.

20121228-094922.jpg

3. Line a few baking sheets with wax paper and make room in the freezer. Prepare to get messy.

20121228-094935.jpg

4. With a spoon or spatula, grab a dollop of candy about 1″ in diameter. It’s going to be very very messy so just do the best you can with it. You want them to eventually be disks on the wax paper, about an 1″ or so apart. The original directions say to make a ball then press it flat on the wax paper. I found it was easier to plop the dollop on the wax paper, use my fingertips to push the edges into a round shape, then carefully pat down the top until it’s smooth.

20121228-100307.jpg

(Have you ever played with cornstarch/water goop as a child? It feels hard but then it always sinks down flat again.. This was kind of like that. It settles on it’s own, you just want to make sure it happens in a nice round shape.)

5. Once an entire pan is full, put it in the freezer for at least 30 minutes. I ended up with 3 trays full of these little pink patties.

20121228-095012.jpg

6. Melt chocolate chips or candy melts in the microwave in 30 second intervals, stirring after each time. Once smooth, remove a pan of peppermint patties from the freezer. Peel off one of the disks, coat it in chocolate, and lay it back on the pan to set up. I found it easier to dip these with my fingers. (They don’t freeze completely solid, so when I used a fork the pattie drooped over the edge of the fork while I was tapping off the excess chocolate.) It’s messy doing it with your fingers, which is why I didn’t get any photos of this step. I had no one else home with me to snap them!

The patties soften to room temperature quickly, so I could only dip about 6 at a time before I had to return the pan to the freezer and switch to another pan. During that time the chocolate coated ones hardened and could be removed to the fridge (or to my mouth).

The dipping was long and aggravating, but TRUST ME, I realized it was worth it once I bit into that first one!

20121228-152245.jpg

Store in the fridge or freezer. And be sure to share, this recipe makes a ton of these!

6 Comments

Filed under Candy

Elf Munchies

This snack munch is easy and pretty and sure to impress!

20121203-100409.jpg

Elf Munchies

Ingredients:

About 8 cups of popcorn (1/2 cup of kernels if popping them fresh)

12 oz white chocolate chips, almond bark, or white candy melts

Assorted sprinkles

Directions:

20121203-094152.jpg

1. Pop some popcorn. You can use microwave popcorn if you want, I just don’t know how it will taste if you get the buttery kind. I used white popcorn and popped it the same way I make my Kettle Corn, but without the sugar. Let it cool.

20121203-094146.jpg

2. Melt white chocolate chips, almond bark, or white candy melts until smooth. Pour over popcorn and stir until evenly coated. I added sprinkles while my husband was stirring. Non-pareils, jimmies, and quins!

20121203-094157.jpg

3. Spread popcorn out on wax paper. I broke it up so that there were no large clumps.

20121203-094208.jpg

4. In freezer zip top bags, melt green and red candy melts. (I like to use leftover candy melts for this because it doesn’t have to melt perfectly smooth to be pretty as drizzle!) Massage bag until smooth. Snip the corner of the bag and drizzle the candy over the white chocolate coated popcorn. I finished off with some more sprinkles – snowflakes this time!

20121203-094204.jpg

5. Wait for the candy to set up completely, then break up popcorn and store in a airtight container or zip top bag.

This would be so cute to leave out with cookies for Santa. The elves deserve some treats too!

20121203-094222.jpg

20121203-094226.jpg

5 Comments

Filed under Candy, Misc

Muddy Buddy Fudge

So everyone knows what Muddy Buddies are, right? Some people call them Puppy Chow. My mom always called it reindeer poop. (Gross, but whatever…)

Anyways, I made this amazing fudge that tastes just like Muddy Buddies!!

I started with a recipe that I am hesitant to even link up, because it’s not really a recipe exactly… it’s a hilarious (but crude) pin I found one day on Pinterest. Click here if you really want to see it. There’s no one to site, but I adapted it anyway so here is my recipe. 🙂

20121109-083518.jpg

Muddy Buddy Fudge

Ingredients:

1 (14oz) can sweetened condensed milk

1 lb semi-sweet chocolate chips

1/2 cup smooth peanut butter

1 tsp vanilla

Directions:

In a large bowl, combine sweetened condensed milk, chocolate chips, and peanut butter. Melt in 30 second intervals, stirring in between to make it smooth.

20121109-083459.jpg

When it starts to thicken up and get harder to stir, add the vanilla and stir to get it all mixed in there.

Spray a pan with non-stick cooking spray. (I used a 13×9 and my fudge was pretty thin. A 9×9 would make a nice thick fudge.) Dump the fudgey mixture into the pan and press it down evenly. Let chill for at least an hour or until firm.

20121109-083512.jpg

Cut into squares and enjoy!!

**If you want to leave out the peanut butter because of allergies (let’s face it – no one really dislikes peanut butter, do they?!), it will still be a good regular fudge recipe!

20121109-083506.jpg

5 Comments

Filed under Candy

Disney Treats

My husband and I just got back from a week long vacation. We spent 8 days in Southern California, and 3 of those days were at Disneyland and California Adventure!

I saw so many fun, yummy and creative treats I thought I needed to share!

20120523-174813.jpg

Above are mickey shaped chocolate dipped rice krispy treats…

20120523-174841.jpg

these are mallow pops.. mickey on the left and minnie on the right!

20120523-174850.jpg

Chocolate and M&M covered giant pretzel sticks.

20120523-174859.jpg

Disney decorated cookies!

20120523-174906.jpg

Princess decorated cookies!

20120523-174924.jpg

Mickey body cookies.

20120523-174934.jpg

Dipped ears decorated cookies.

20120523-175039.jpg

Mickey face soft pretzels.

20120523-175100.jpg

Mickey head sourdough bread. BTW those are about the size of my head!

20120523-175110.jpg

Some more decorated cookies and krispies.

20120523-175129.jpg

These are cake pops! Holy moly they were like 4″ across!

20120523-175138.jpg

Mickey chocolate chip cookie dipped and swizzled.

20120523-175144.jpg

Dipped ear cookies and baseballs.

20120523-175151.jpg

SOOO in love with these caramel/candy apples. The ears are marshmallows!

20120523-175157.jpg

A couple more apples… pooh’s hunny pots, and some nightmare before xmas jack heads.

20120523-175204.jpg

These tigger tails are marshmallow pops! Super cool!

20120524-090509.jpg

The ice creams above are actually cupcakes in cones. I’v made cupcakes like this before but never so cute!

My hubby and I also went to Universal Studios Hollywood and I spotted some cute treats there as well. (Are cute treats on the rise, or did I just never notice this kind of stuff before I immersed myself in it?)

20120527-225134.jpg

Spongebob decorated cookies.

20120527-225141.jpg

Cute animal apples…

20120527-225146.jpg

I LOVE the pink piggie ones!

20120527-225151.jpg

It’s hard to see from the angle but there are some animal mallow pops on the left up there…

20120527-225156.jpg

Turtle apples, marshmallow apples, and I think the ones on the right are rocky road apples…

That’s all I have for now. Hopefully soon I will be able to share something cute that I made myself!

8 Comments

Filed under Cake Pops, Candy, Cookies, Marshmallows, Misc

Christmas Coal

This idea I got from Pinterest. It blew my mind, just as much as the cake and soda thing. Sorry there aren’t more pictures, this was kind of a fast process and, well, I forget. You ever forget? It happened to me.

So you take an entire pack of Oreos (double stuf of course) and grind them to smithereens in the food processor. I hope that’s how you spell smithereens. Fun word.

This process is fast, so you want to have your pan ready to go. Take a sheet of wax paper and shove it in a 8×8 pan. (I guess you could use 9×9 but they’ll be a little thinner.) The paper won’t stay, but that’s okay for now. Rub butter all over it so that your treats won’t stick. Trust me, wax paper doesn’t taste so good.

Then in a large microwave-safe bowl, you take 5 cups of marshmallows – I used the minis (and yes this is how I measure a “cup” or marshmallows), and melt it with 4 tablespoons of butter (half a stick) until the marshmallows get puffy and the butter is melted (takes about 2 minutes, at 30 sec intervals).

20111221-221349.jpg

After it comes out of the microwave, stir in 1/2 teaspoon of peppermint extract. You can leave this out if you want, but I tried it both ways and with peppermint was much tastier!

Dump in the Oreo crumbles and mix mix mix until you can’t mix any more… It gets very hard, so have a strong man handy if possible to do your stirring. Once it’s good and mixed up, scoop it all into your pan and press it in as hard and as flat as possible. Make sure you get it good in the corners and everything. You want your coal to be pretty, right?

Now comes the hardest part. You have to wait. I did this in the evening and waited until the following evening to cut it. I’m guessing a couple hours would do it though.

Once the waiting is over, pull up the wax paper and pop out the massive chunk of coal and cut up into little squares. There you have it, Chrsitmas Coal!

20111222-181241.jpg

The texture is kind of like a tootsie roll. Chewy, soft, just a slight minty flavor… and come on – you can’t go wrong with something created from Oreos!

20111222-181247.jpg

I suspect kids would love this recipe, and it’s something they could definitely help with. Plus, it’s fast and easy, and doesn’t take much planning. I hope you will try it!

Leave a comment

Filed under Candy, Marshmallows

Christmas Marshmallows

20111221-222117.jpg

Easy, gorgeous, and soo yummy! I will not reveal how many of these I ate. Mainly because I don’t know, I lost count!

Leave a comment

Filed under Candy, Marshmallows

Halloween Treats!

Here all all the Halloween treats I made. These were for our annual Halloween party and for my work potluck. Cookies also went to my husband’s work per special request. They always see pictures, but hadn’t had the chance to taste them until today!

I made Cake Pops… (These are funfetti, with some leftover green frosting from the Pumpkin Cupcakes I made a few days ago. The result was a green center to these little pops!)

Chocolate dipped marshmallows…

… and of course lots of cookies!

Pumpkins…

and I did some on sticks for testing purposes… I ended up having to do a double cookie, with the stick in between. I roll thinner than most people, and without the second cookie it was way to much of a ‘bump.’

Ghosts…

Spider Webs…

Tombstones…

Frankensteins… (who are happy!)

Bats…

Witch shoes… (which are my version of this idea from Sugar Belle)… my laces ended up soaking up some of the black from the shoes. 😦 Oh well, you get the idea…

Candy corn…

Skeletons… (from my gingerbread man cookie cutter by the way)

Cauldrons…

and a couple Boo!’s 🙂

Here is a photo of the tray my husband took to work with him:

Halloween is one of my favorite cookie holidays… I just wish I could have had a little more time this year. Moving + holiday is a lot of work! Thankfully I will have a minor lull before it gets cRaZyCrAzY for Christmas!! Which is in less than 2 months for those who are trying to block it out! 🙂

3 Comments

Filed under Cake Pops, Candy, Cookies, Marshmallows