I don’t make New Years resolutions. Not because I don’t keep them, I just believe that if you want to make a change it should happen when you want it to happen!
That being said, I’ve set myself a goal for 2016. Which is kind of like a resolution I guess. I have had so many new “techniques” I’ve wanted to try but never have. Some because I just don’t typically have those ingredients. Some because they seem too hard or scary. 😜 But since life is crazy with 2 little ones, I’ve challenged myself to do only 1 a month.
I realized Friday that January was quickly coming to an end and immediately started brainstorming on what I could make that night without a trip to the store.
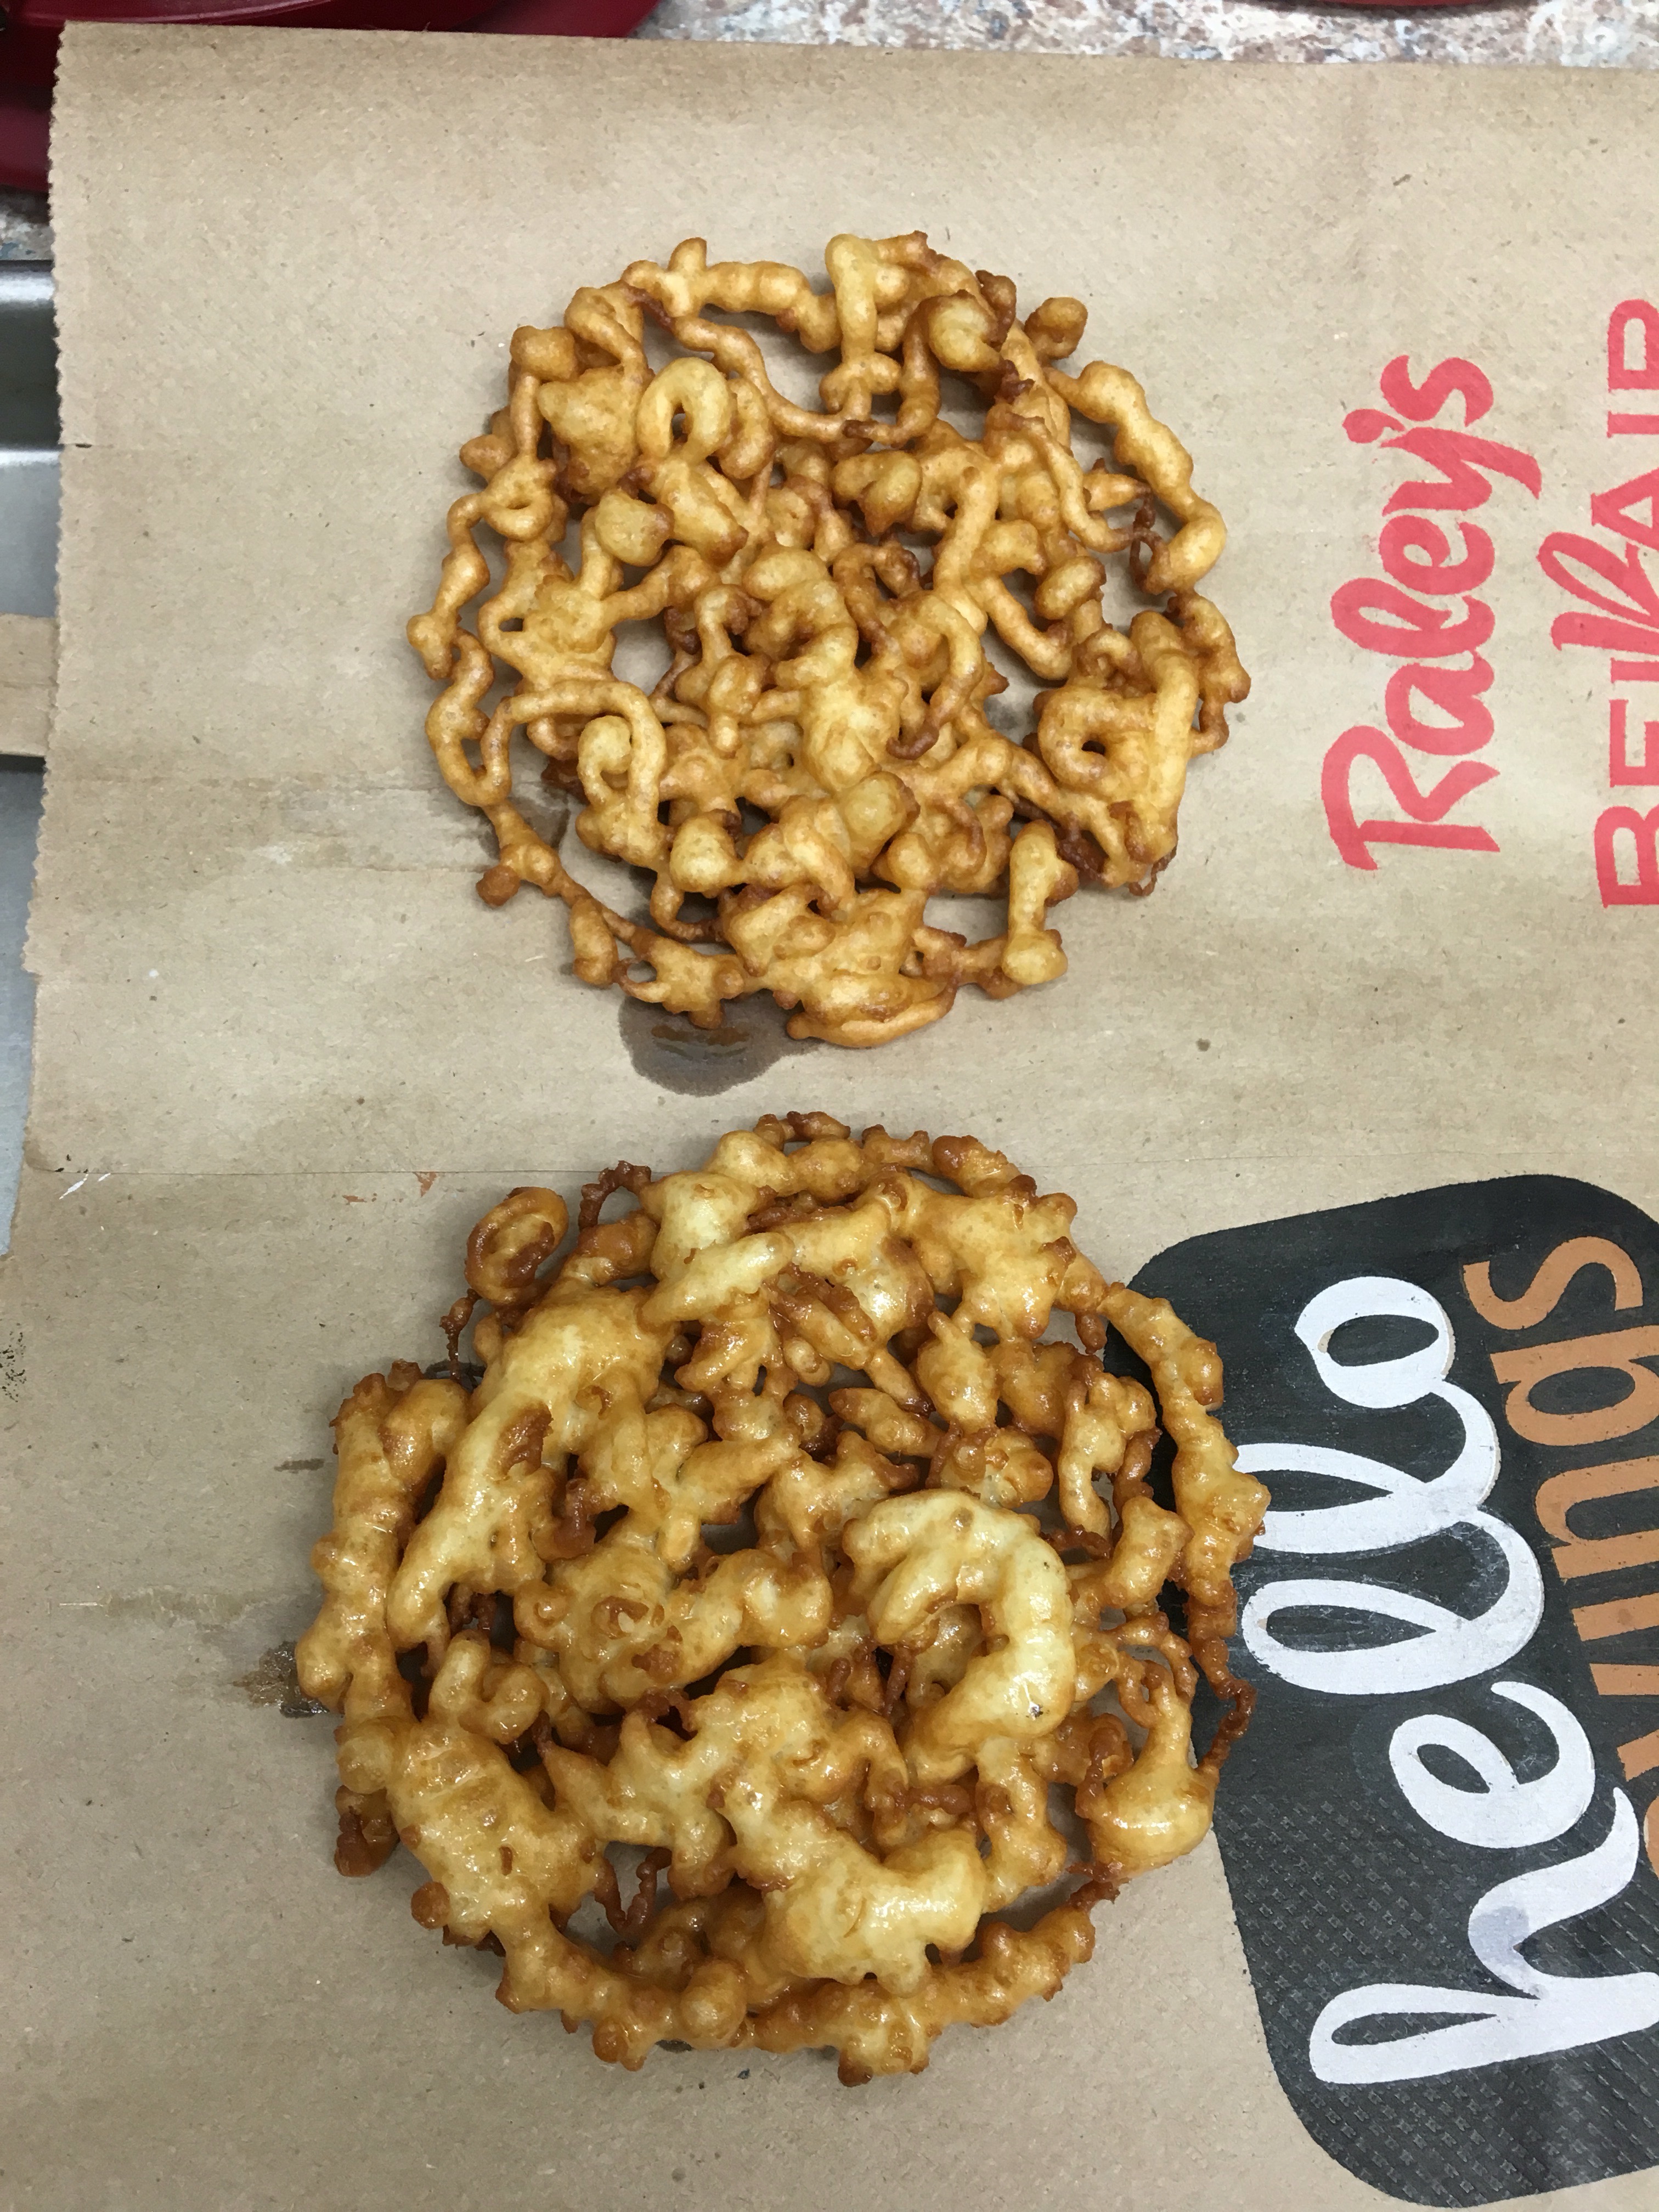
I picked Funnel Cakes! I very rarely get them since they’re only available at fairs or amusement parks. I’d never even seen a homemade funnel cake recipe, but I figured it couldn’t be too hard right?
Searching Pinterest I quickly found a few and they were more or less all the same. I ended up going with this recipe because I liked her technique with the cookie cutter. So here we go!

Funnel Cakes – adapted from here
makes about 15 4.5″ cakes
Ingredients:
1 egg
1 1/3 cup milk
1/2 tsp vanilla
1/4 tsp salt
1 tsp baking powder
1/4 cup powdered sugar
1 1/2 cup flour
Oil for frying (I used vegetable oil)
Directions:
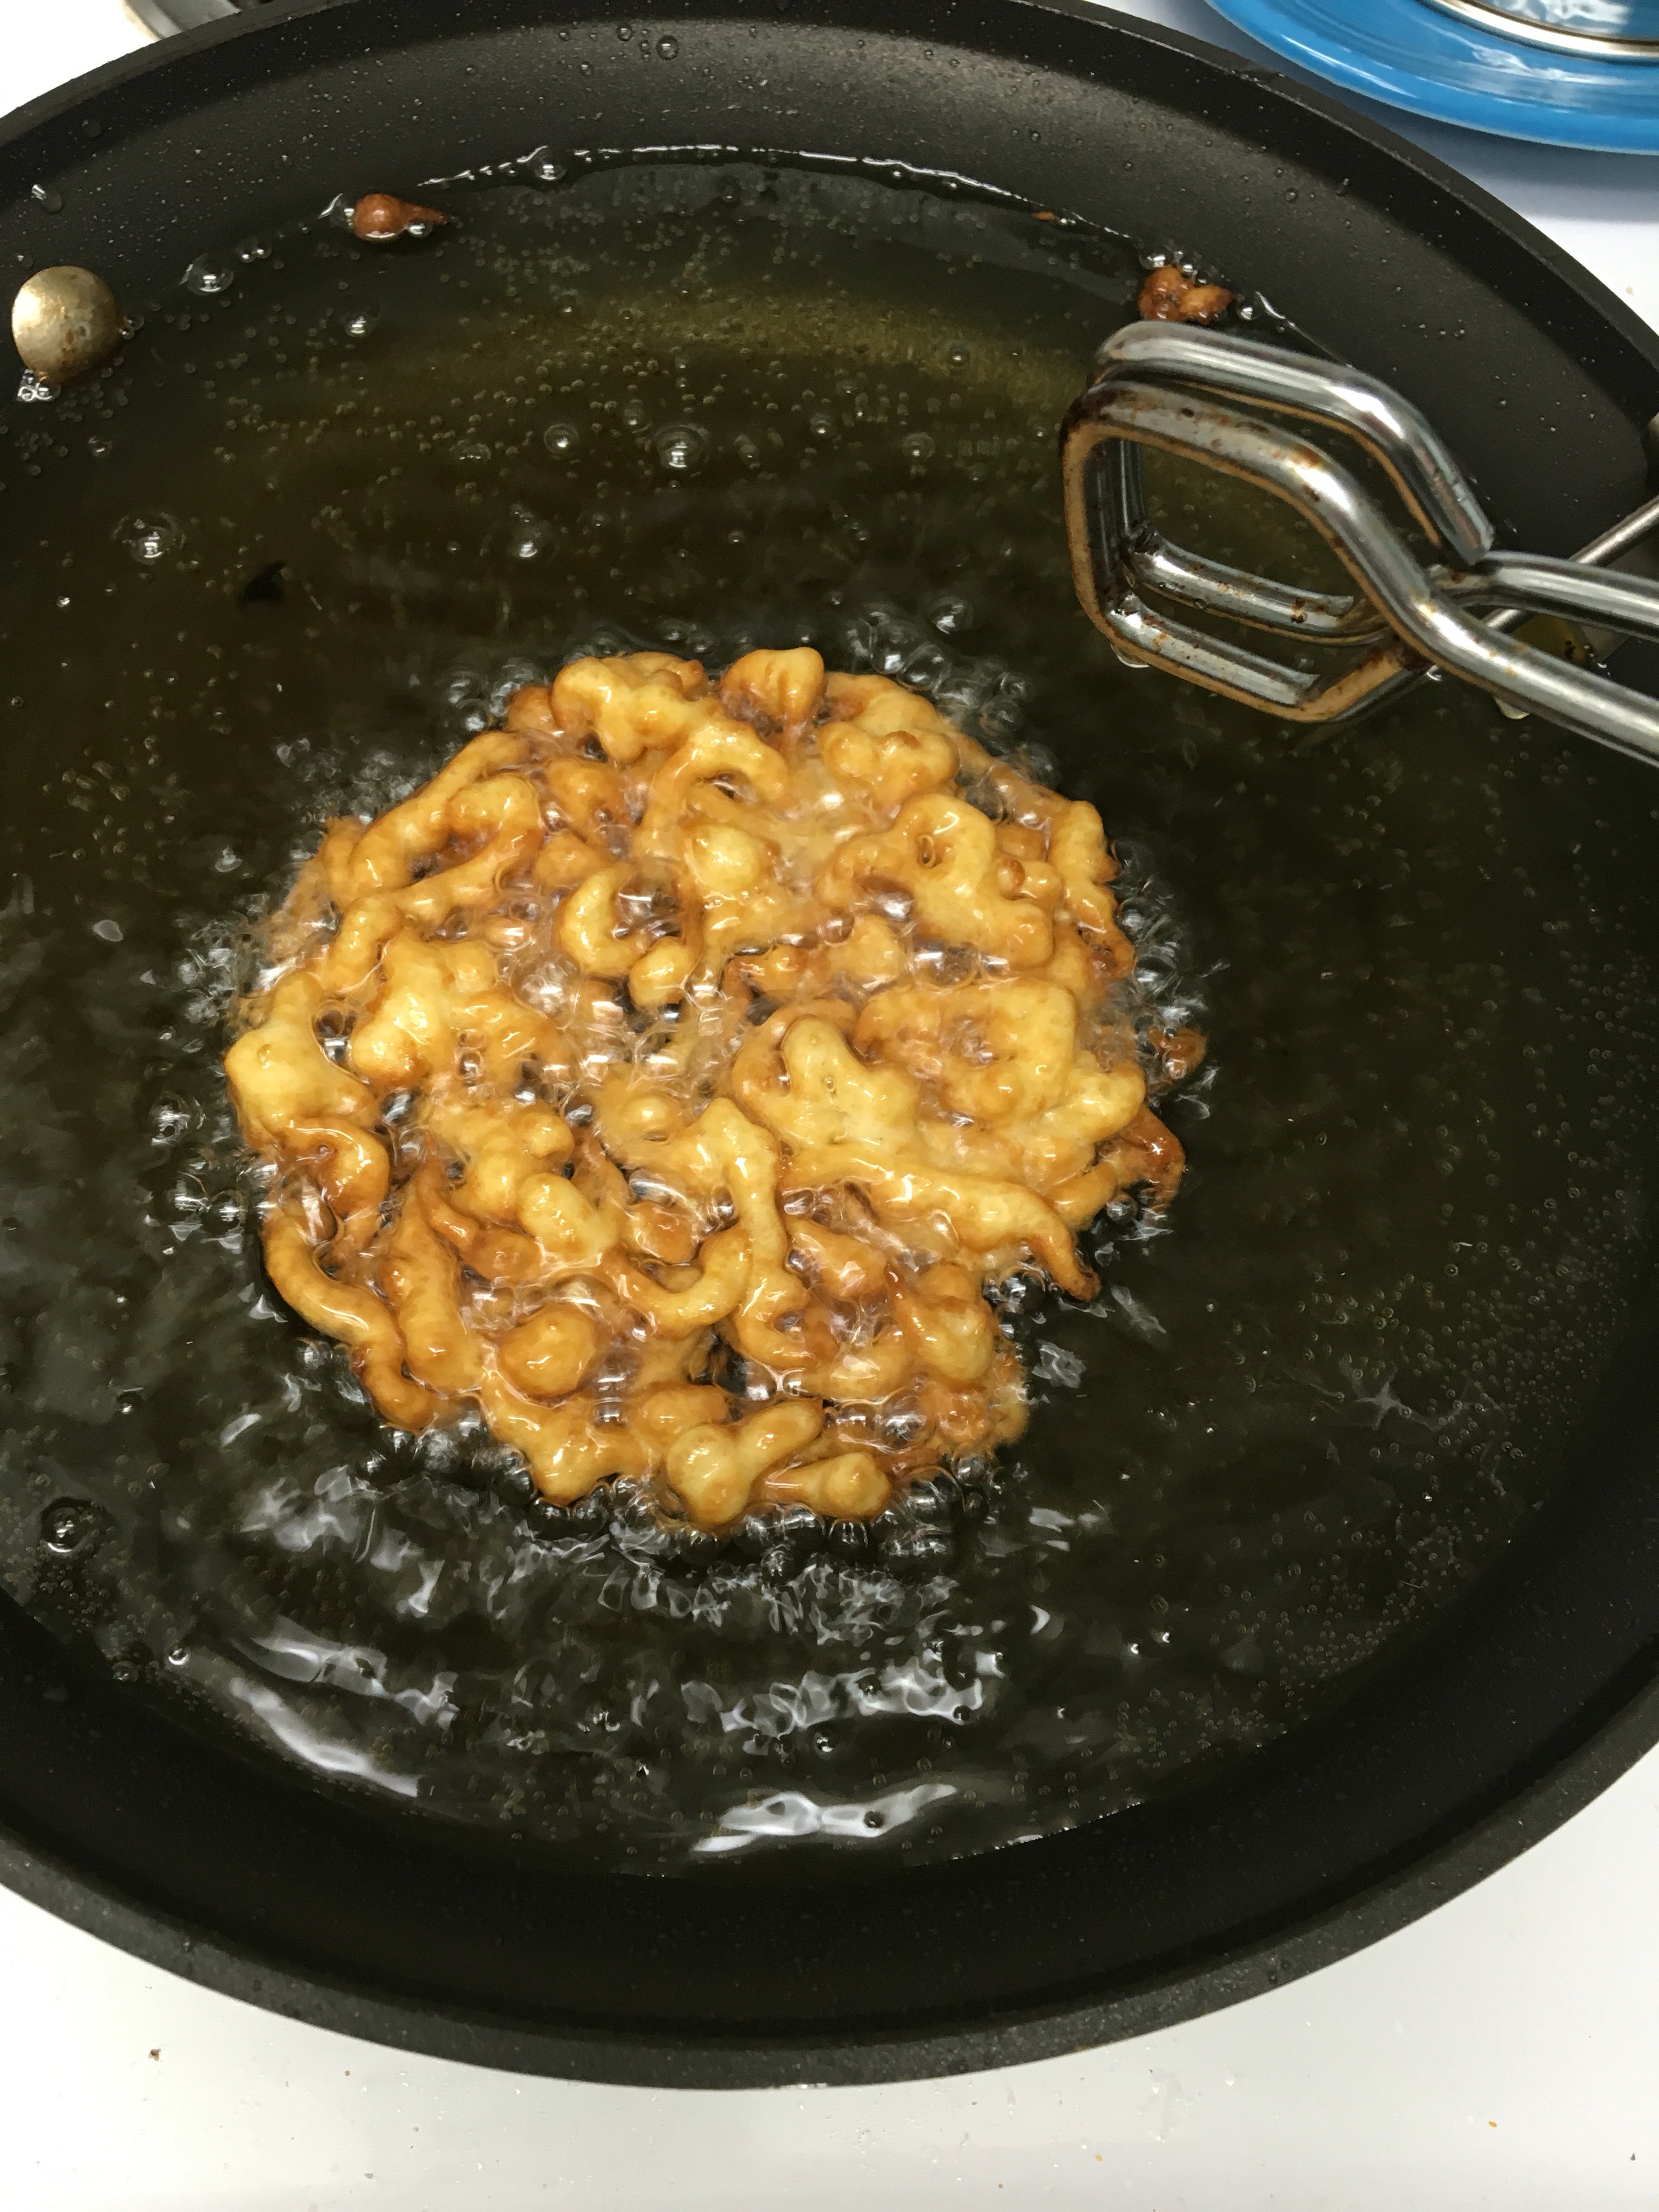
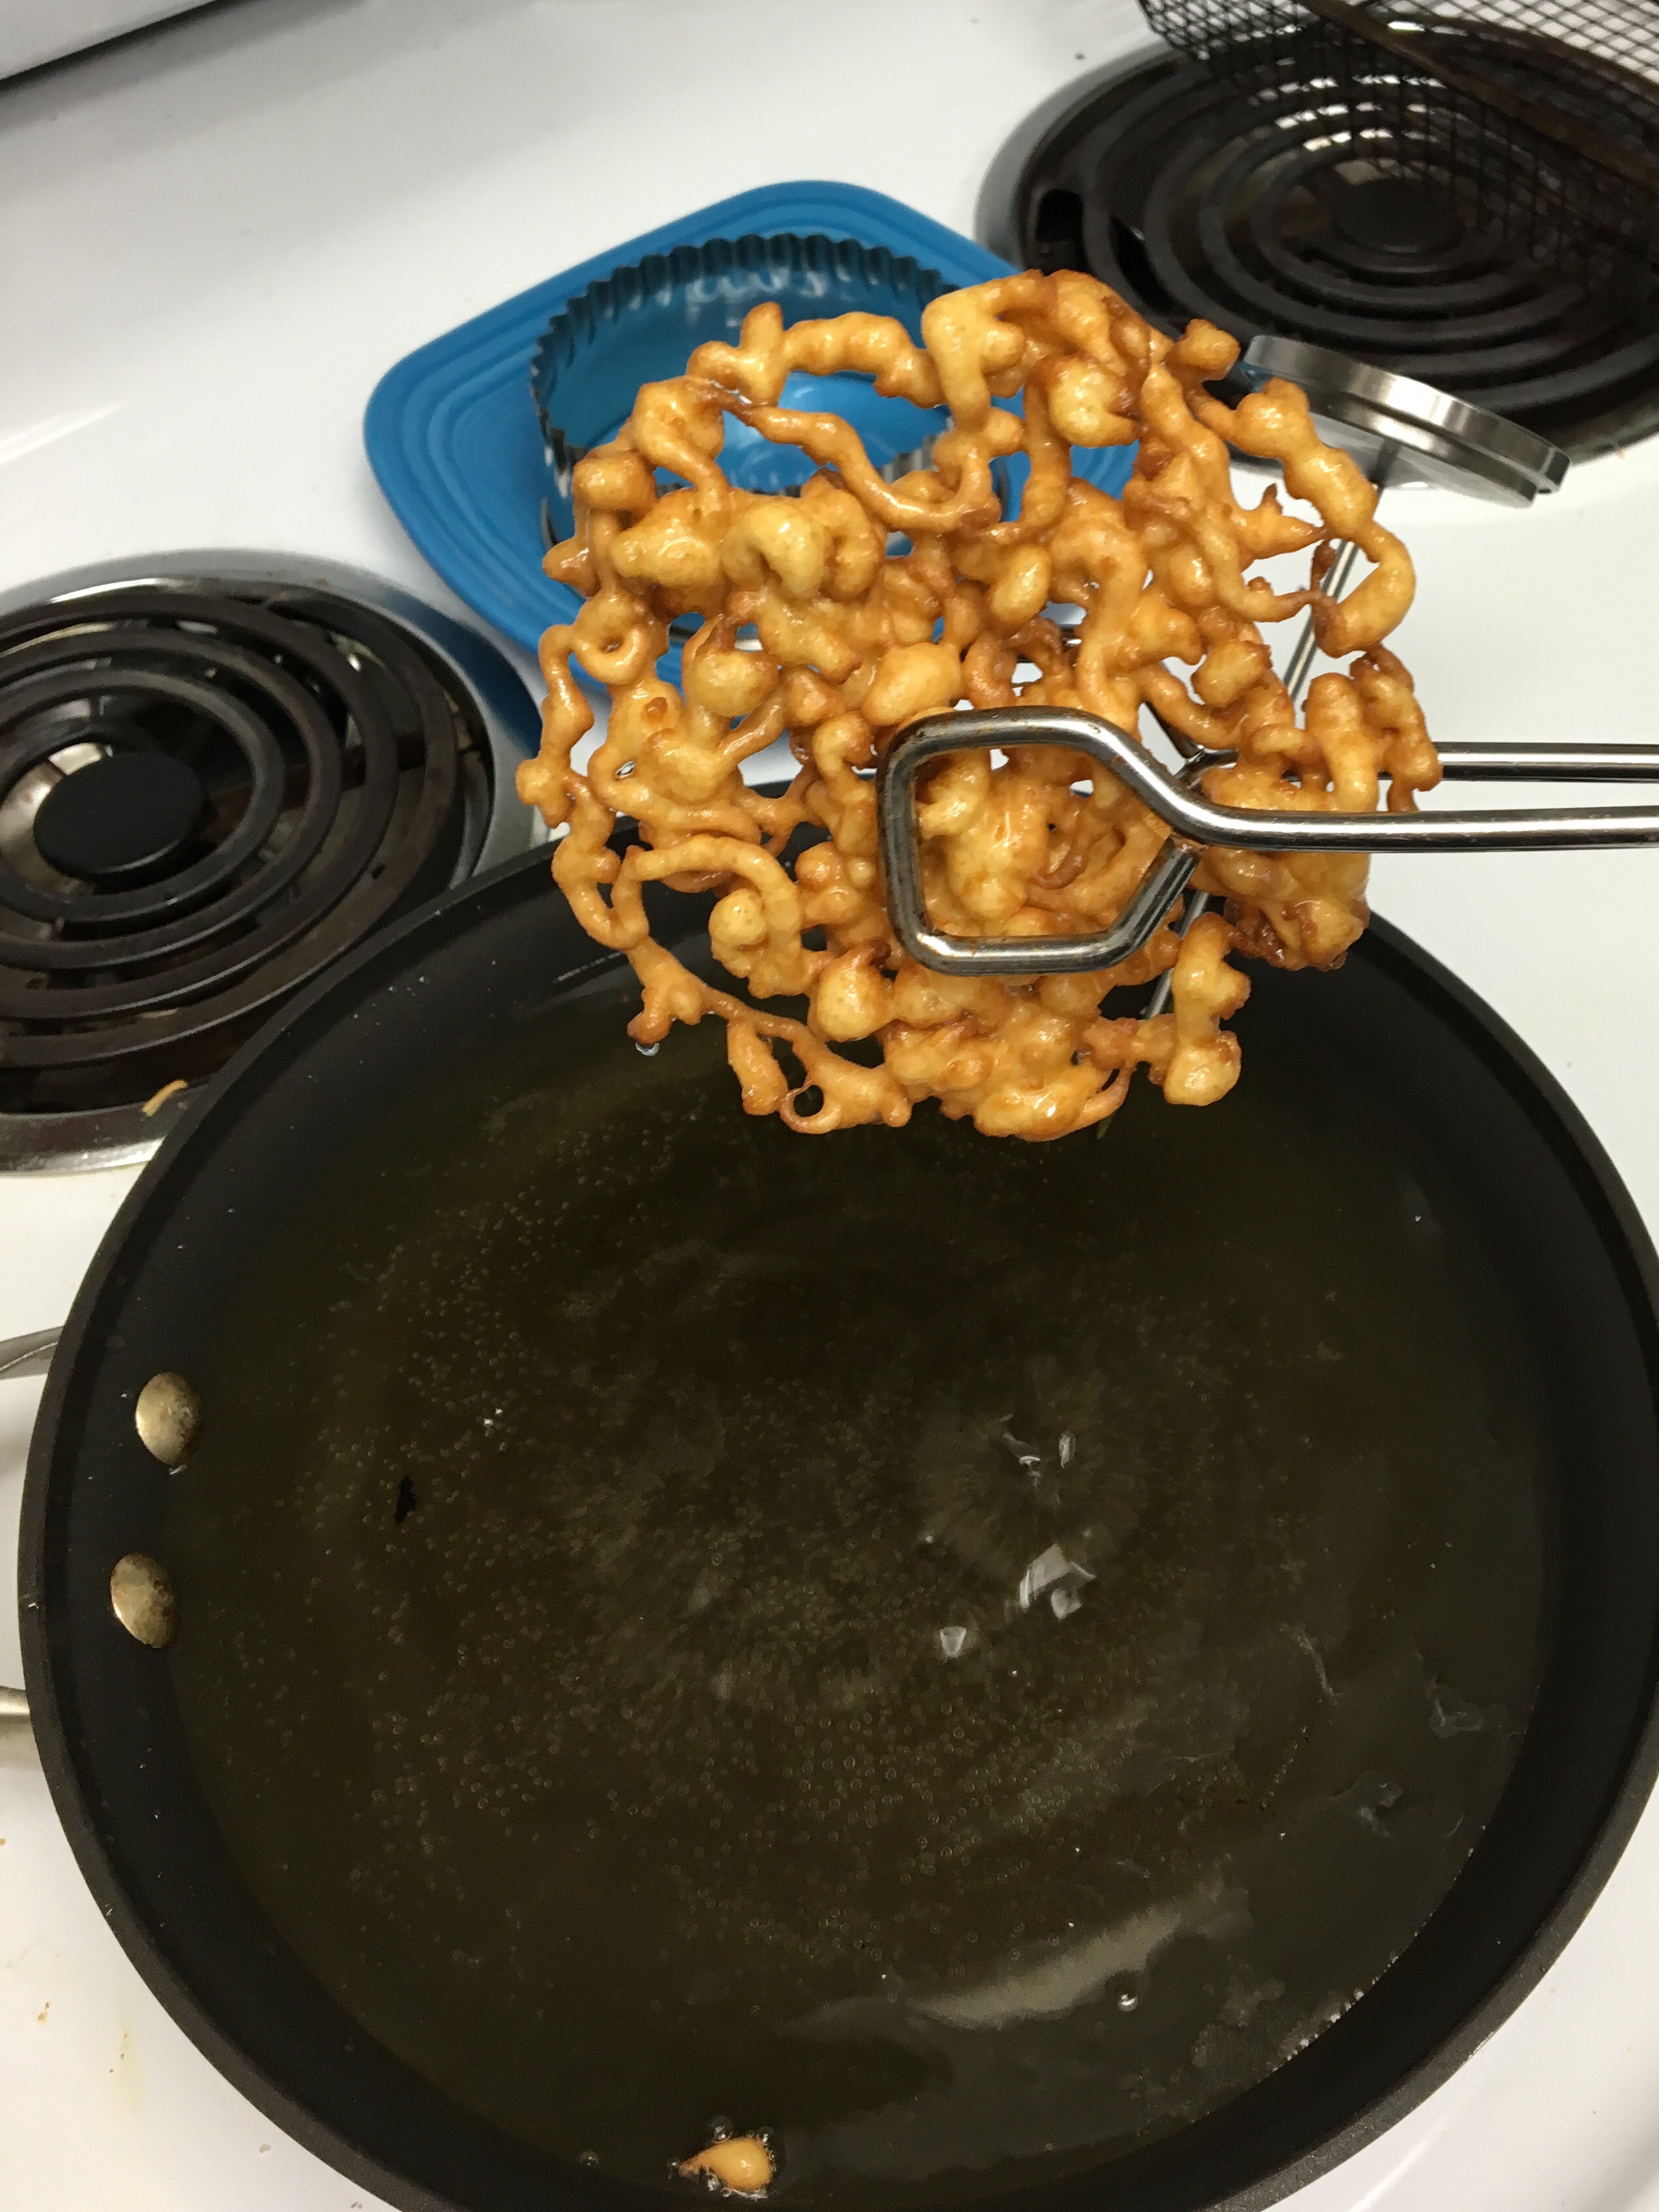
1. Set up your fry station. Pour about 1/2 inch of oil into a pan. Place a brown paper bag on a cookie sheet next to the stove. Have a plate handy to hold the cookie cutter when not in use. Clip a thermometer onto the pan with the tip in the oil (make sure it doesn’t touch the bottom of the pan).
2. Beat egg, milk, and vanilla. With mixer running, add salt, baking powder, then powdered sugar. Slowly add flour last.
3. Scrape the bowl then pour mixture into a squeeze bottle. I used one like this and had to fill 3 times total. I got 5 cakes out of each full bottle.
4. When the oil reaches 350* it’s time to go! Use the tongs to place the cookie cutter in the center of the pan.
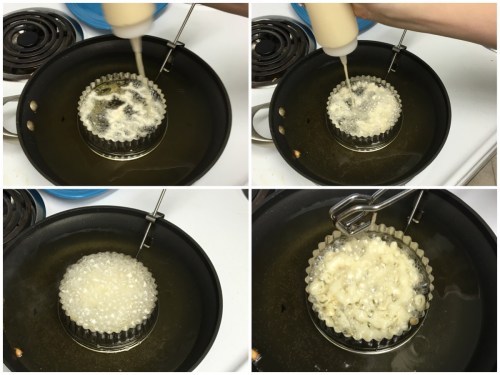
5. Squeeze the batter into the center of the cutter. If you make a circle first then fill it in in a squiggly/crisscross pattern it will stay together better. Keep going until there’s a good amount of batter coverage. (Took me a few times to get it right.)
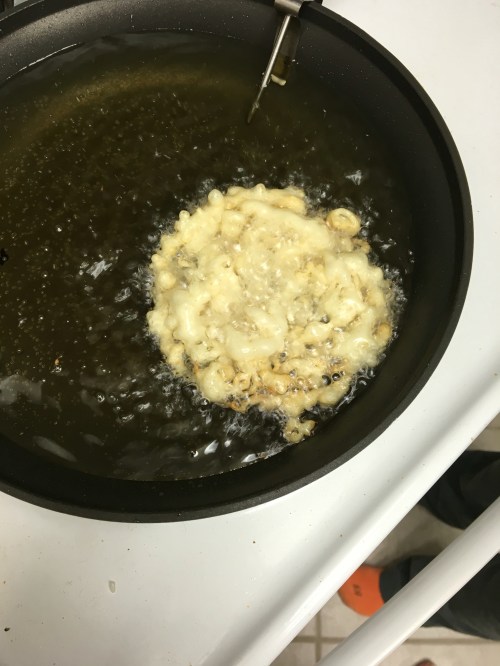
6. Once the batter is solid you can remove the cookie cutter and let it float. Flip it and let the other side get golden brown, then remove from the oil to the brown paper bag to drain.


The entire cooking process takes about 1-2 minutes. It’s very fast. That’s why you want to have everything set up ahead of time, because if you have to stop to do anything, the cake will burn.

If you want to top the funnel cakes in powdered sugar it has to be done right away or the powdered sugar won’t stick.
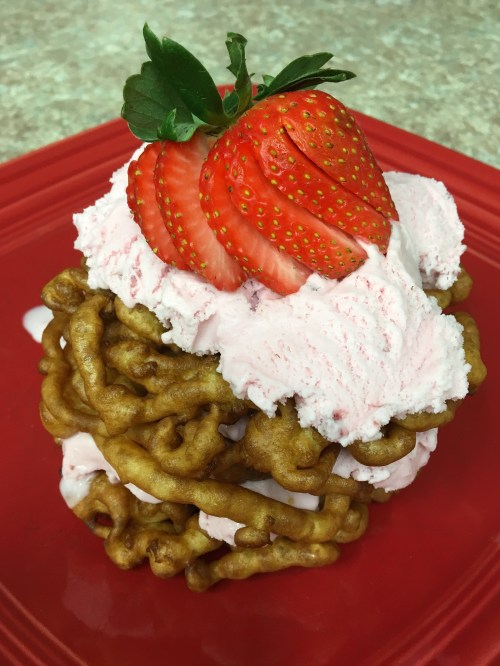
You can also top with chocolate syrup, fruit, or ice cream!


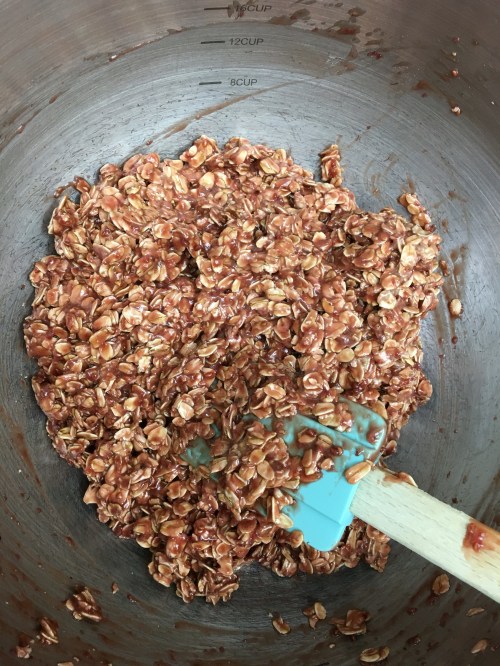
 3. Mix together the rest of the ingredients. It will be a wet sloshy sticky mess.
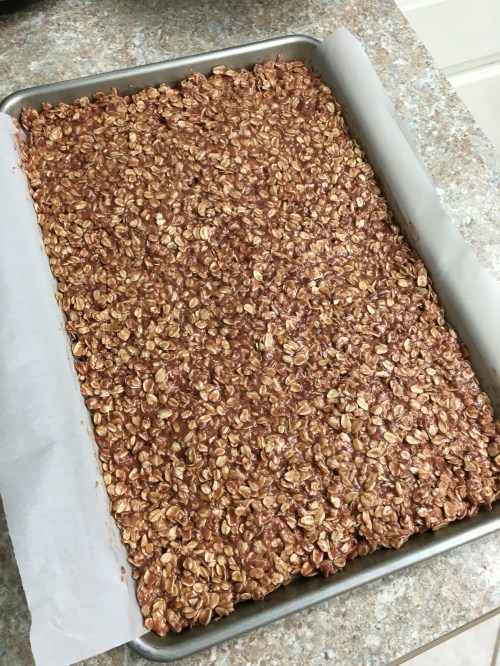
 4. Line a baking sheet with parchment paper.