Monthly Archives: January 2012

Domain Registered

I feel so official now!

Look up in the address bar at the top… notice anything?

I am now easier to find! My new website is cookiecarrie.com.

If you have me bookmarked, no worries, the old carriescreations.wordpress.com will still work.

Everything else is staying the same for now…

See you soon with more treats!

Advertisement

Leave a comment

Filed under Uncategorized

Funfetti Krispy Treat Cake

Once again, an idea from Pinterest has brought me here. Though I tweaked this one a bit.

As the title suggests, what sets these rice krispy treats apart from regular krispy treats, is the addition of funfetti cake mix. Not prepared cake batter. Just dry cake mix.

I had this box of holiday funfetti, so I decided to use it. (My brother works at a grocery store and found it after Christmas for super cheap.)

20120126-212125.jpg

Since everyone is pretty much over the red-and-green thing by now, I added in some other colors to hide that it was holiday funfetti.

20120126-212321.jpg

The colored sprinkles I bought at Layer Cake Shop, in a colored sprinkles assortment. I love having the colors separate because I can mix them however I want, or I can use just 1 specific color. (Like I did here for over the hill cookies and here for a 6 year old’s birthday cookies. Also think baby showers!)

20120126-212412.jpg

See? Can’t even tell it was meant for Christmas!

20120126-212347.jpg

Okay I have to be honest here. I have never made rice krispy treats until now. I learned a few things. 🙂

First you melt 3 tbsp butter and 1 10-oz bag of mini mallows in a large pot. It looks clumpy until it starts to melt fully.

20120126-212333.jpg

Once it’s smooth, mix in 1/3 cup funfetti cake mix (or yellow cake) a spoonful at a time.

20120126-212403.jpg

Sprinkle time! This is where I got a little messed up. (Pretend this next photo isn’t blurry.)

You want to have about 1/4 cup sprinkles, equal to about 1 full jar like you’d buy at the grocery store. Pull the pot off the hot burner and mix about half of the sprinkles into your melty mallows. Mix quickly and as little as possible – the sprinkles will melt and turn your mallow mixture greyish like mine. 😦

20120126-212420.jpg

Mix in 6 cups of rice krispies , then press into a greased pan. Normal people use 13×9 cake pans, I decided to go with a bundt/jello mold pan. If you use a 13×9, you can sprinkle the remaining sprinkles on top.

20120126-212430.jpg

Let it sit up for at least an hour. This is my Krispy Cake once I popped it out of my pan… oh yeah I forgot to mention I threw some sprinkles in the bottom for good measure.

Now comes the part where I got a little crazy. I put a little bit of candy melts in a bag, and melted them at 30 second intervals until they were smooth. Okay so I did 5 colors.

20120126-212501.jpg

Then I snipped a corner of each bag and squeezed colors all over my funfetti krispy bundt. Then I used the rest of my sprinkles. A lot of sprinkles. Here is the mess I was left with:

20120126-212518.jpg

I let the candy melts set (maybe 2 minutes) then transfered it with a cooking spatula to my cake plate. Then just cut and serve!

20120126-212534.jpg

Quick and tasty!

P.S. Obviously I now have leftover cake mix. I have seen many-a-recipe with dry cake powder, so I am saving it in a mason jar until that day comes.

20120127-084906.jpg

4 Comments

Filed under Misc

Cookie Dough Truffles

I had a craving for cookie dough.

Not cookies, just dough.

This was the kind of craving that I couldn’t control. So I decided I had to make some cookie dough! I was just going to go from my recipe and wing it a little, but then I remembered about this that I had seen a while back.

By the way, I love Pinterest – if you haven’t noticed. If you’re not part of Pinterest yet and you want another form of internet addiction, then you should sign up! Pinterest is basically a virtual idea board that you can share with everyone. You collect pictures of things or ideas you like by “pinning” them to separate pin boards.

Anyway, back to cookie dough. The recipe I had pinned for cookie dough truffles was safe to eat raw because it does not contain eggs. I decided it was best to go that route. Here is the recipe I used, adapted from eat.drink.smile.

Cookie Dough Truffles

1 cup (2 sticks) butter, room temperature
3/4 cup granulated sugar
3/4 cup packed brown sugar

2 tsp vanilla
scant 1/3 cup milk (little less than 1/3 cup)

2 1/2 cups all purpose flour
1 tsp salt
1/4 tsp baking soda

1 cup semi-sweet chocolate chips (I used reg size but mini would work!)

More chocolate for dipping (optional)

Directions:

1. Beat together butter and sugars until combined.

2. Add vanilla and milk and beat, scraping and cleaning beaters/paddle a couple times.

3. Mix together flour, salt, and baking soda, then slowly add to wet mixture until completely combined.

4. With a wooden spoon or spatula, stir in the chocolate chips.

If you are only making this to eat the dough, you can begin at any time.

5. Chill dough for about an hour.

6. Roll about 1″ sized cookie dough balls, and set on wax-paper lined cookie sheet about an inch or two apart. Put the whole pan in the freezer for 30 minutes.

7. When the cookie dough balls are ready to go, melt chocolate chips with a little bit of vegetable oil in 30 second intervals until it can be stirred smooth.

8. Dunk a cookie dough ball into the chocolate and roll it around until it’s fully coated. Lift the ball out with a fork and tap on the edge of the bowl until all the loose chocolate drips off. Scrape the ball off of the fork and back onto the pan.

20120121-173551.jpg

9. When all balls are coated, put the pan in the fridge until chocolate is set. Keep cookie dough truffles in the fridge until time to eat.

20120121-173600.jpg

(They were brother approved!)

20120121-173611.jpg

Craving challenge dominated!

1 Comment

Filed under Misc

Sugar Cookie Recipe and Basic Baking Tips

*****UPDATE** MAY 2013*****************************************

I am now using a new recipe, so I crossed out the old one below.

The new recipe is just as tasty, but a little easier to work with. The baking tips below still apply, but the directions have been modified a bit.

Here is a printable link!

As always, this recipe can be used for cutout cookies, rolled in balls, or dyed.

For my buttercream frosting (outline) recipe, go here .

For my icing recipe, go here. Read more about my icing here.

*******************************************************************

Continue reading

3 Comments

Filed under Cookies

Unicorn Poop

I am such a girl in that I love rainbows, anything sparkly, and everything make-believe. When I saw this on pinterest, I almost exploded immediately with excitement.

Don’t be scared, it’s really just sugar cookies all dolled up. Tasty and cute, and I have a feeling little girls would LOVE this. I need to get me one of those.

I mostly followed the tutorial linked with the pin, but I put my own spin on it.

Store bought doughs do not work well for these cookies. The recipe must hold it’s shape well for them to turn out looking like poopies. This recipe is my go-to and would work really well for these cookies because it holds its shape.

I divided it up into 5 equalish sized balls. Instead of regualr rainbow colors, I girled it up even more: pink, yellow, green, blue, and purple.

20120115-131128.jpg

I just added a bit of food coloring to the ball of dough, and carefully kneaded it until it was all mixed in. To avoid staining my hands, I put the dye in the middle and folded the dough over it. Then I kneaded it carefully keeping the dye in the center until it was mostly absorbed, then I was able to knead it like normal until it was all mixed in.

Using regular dropper-food coloring (like you buy at the grocery store) may not make as bright of colors and will be more likely to dye your hands. I recommend the Wilton food coloring gels that come in the little tubs at the craft store.

20120115-131135.jpg

Just like with playdough, you want to make long skinny snakes. Then stack together the snakes until you have one of each color. My  snake was about 18″ long. Once I had all the colors, I broke it in half and rolled one half just enough to make all the snakes stick together. (If the dough is too sticky, you can use some flour when you roll it – it will not effect the outcome of the cookie.)

20120115-131141.jpg

Then twist the snake like this…

20120115-131152.jpg

Then coil it up on your cookie sheet to look like a poopy!

20120115-131200.jpg

Bake at 350*F about 8 minutes or so, depending on how big the “turds” are. I did some with sugar pearls, which have to be stuck into the turds prior to baking.

After the cookies are baked and cooled, it’s time for them to get sparkly! I used Wilton Sparkle Gel. (I found it in the cake section of the craft store, near the food coloring and premade icing.) I did not know this stuff existed until now, but I’m a little scared because it might end up on everything I make from here on out!

It reminds me of that nasty decorating gel they use on cakes, that blood-red goop, anyone know what I’m talking about? Except this stuff is clear and sparkly! I squirted a line across the cookie, then used a paint brush (that has never been used for paint by the way) to get it covering the entire unicorn’s doodoo. At this point, they are gorgeous…

20120115-131209.jpg

…but if you want to add a little bit of sprinkles, do it while the gel is still wet. I added some plain white nonpareils because they stood out really well.

20120115-131215.jpg

Who knew unicorns were that magical?

The next picture shows the sparkly-ness the best. These cookies are not wet, they’re just that shiny and sparkly!

20120116-074717.jpg

To sum it up like Kirsty Lynn said on the original post: “The amount of poops you will get from this recipe depends on how big your unicorn is.” LOL

… my unicorn made 44 poops about 2-3″ in diameter.

36 Comments

Filed under Cookies

S’more Pops

S’mores no longer live in just the camping world. S’more treats of all kinds have been popping up everywhere. This little version was fun and easy, and so delicious it might change your life. If you’re into s’mores anyway.

20120109-113816.jpg 

First I crushed up some graham crackers, then put them on a small plate.

Then melt your chocolate. It needs to be pretty deep so that the mallows will dip easily. Next time I will try microwaved instead of melted in my double broiler, cuz it was just a little too wide.

20120109-113826.jpg 

Shove sticks onto your marshmallows. Don’t go more than about 1/2 the way through, or else your pop will become too heavy and slide down the stick. You don’t want to be crying over something as silly as ugly marshmallows… not that I know from experience or anything… (If you plan to have them stick up, shove the stick all the way through to the tip.)

20120109-113840.jpg 

Dip the marshmallow into the chocolate, then immediately roll in graham cracker crumbs. Place S’more Pop either stick up on wax paper, or Pop up into a styrofoam block.

That’s it! Now let’s look how pretty they are.

20120109-102246.jpg 

Ooh, aahh… drooling yet? Make these. Now. I will too. Mine are already gone.

20120109-102237.jpg

P.S. Like my new stand? More on this soon!

2 Comments

Filed under Marshmallows

Bubblegum Cupcakes

I was inspired and intrigued by this photo. When I was younger, I was in love with this blue bubblegum flavored ice cream at the nearest waterpark. It had real gumballs throughout. So naturally when I saw a bubblegum cupcake, I wanted to create it myself!

20120109-113646.jpg

20120109-113630.jpg

Whenever I make cupcakes now,  I put my batter in piping bags so that I don’t make a mess when filling my liners. A big ziploc bag would work too, just cut one of the corners.

20120109-113659.jpg

The actual cupcakes didn’t come out as pink as I wanted, but at least I had good pink liners on them.

20120109-113724.jpg

20120109-113731.jpg

Look how pink I got my frosting! I used my normal buttercream recipe, but substituted half of the vanilla for bubblegum flavoring.

20120109-191434.jpg

I had to get gumballs to decorate them. Apparently it’s hard to find gumballs in all the stores around here. This is how I had to buy them.

20120109-191547.jpg

They turned out pretty cute. Too bad I work during all daylight hours and couldn’t get better lighting for these photos!

20120109-191458.jpg

20120109-191559.jpg


20120109-191542.jpg

The taste? Exactly like bubblegum. It’s good. A little weird because it’s so much like bubblegum, that you expect what’s in your mouth to be chewy. Very strange sensation, worth a bite!

2 Comments

Filed under Cakes

Lemon Cake Balls

First things first, I have to make an important distinction that will impact the future of my little baking blog.

Cake Pop = bake cake, crumble cake, mix in frosting, form into balls, dip. Whether it has a stick or not, this is the essence of a Cake Pop. I have an entire category dedicated to them. They are heaven. If you have never tried one, go to Starbucks and get the pink one.

Some people, however, do not like Cake Pops. (Crazy, right?!) They say they are too sweet, too rich, whatever. I use those phrases sometimes too, but not about Cake Pops! Others think the texture is weird. They’re gooey-ish, so it almost seems like they are uncooked. I hate lots of foods because of texture, so I can’t hate those people either. Anywhooo, I won’t judge. Because  there is a solution to these Cake Pop hating individuals.

babycakes!!!

20120103-220839.jpg

It bakes cake (and just cake) into balls, so that you can skip the whole crumble-cake, mix-in-frosting, form-into-balls part. You just bake the cake, then dip it! Another bonus, the little balls of cake take just 4-5 minutes to cook! Sorry for all the exclamation points, this is just a very exciting idea.. especially for all the Cake “Pop” haters.

So has anyone else caught on to the dilemma here?

What do you call these little balls of cake? Although the machine refers to them as Cake Pops, they are not the same thing and I refuse to refer to them with the same name. After much thought on the matter, I have decided to call them…..

Cake Balls.

Creative, I know. (For future reference, Cake Ball posts will be classified under “Cakes” and not “Cake Pops.”)

So here we go with my first Cake Ball run!

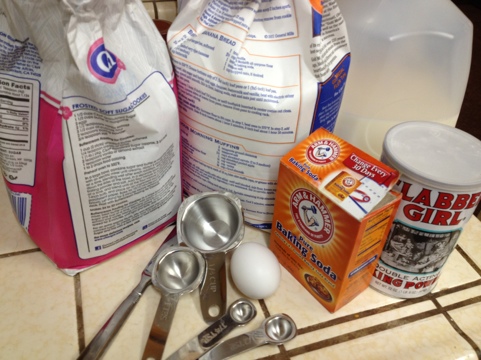
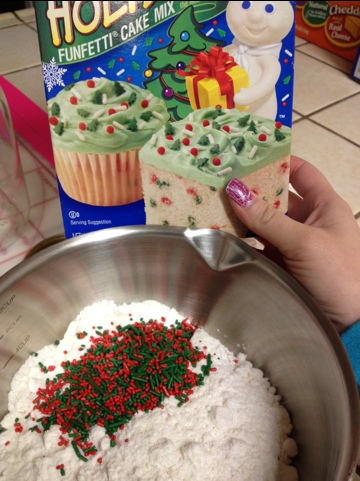
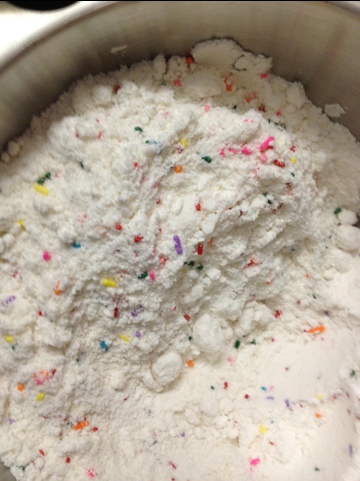
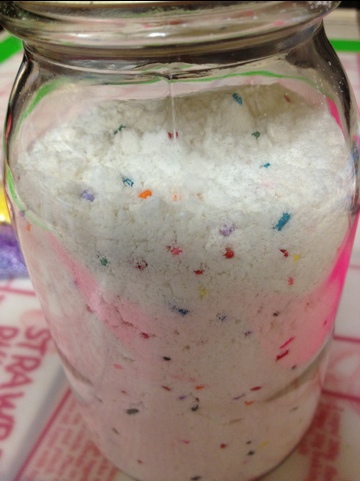
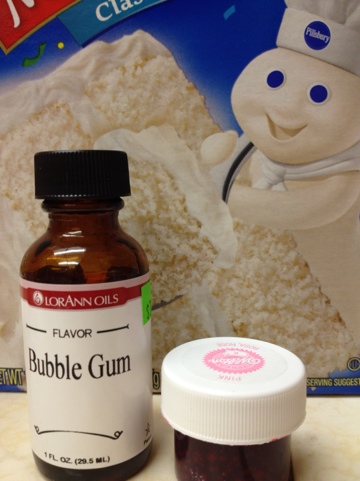
I went with a from scratch recipe for the first time, but I am pretty sure box cake works with it too. I’ll let you know next time. (**update** boxed cake does not work!)

20120103-220825.jpg

First batch was a little brown. Still tastes amazing though!

20120103-220845.jpg

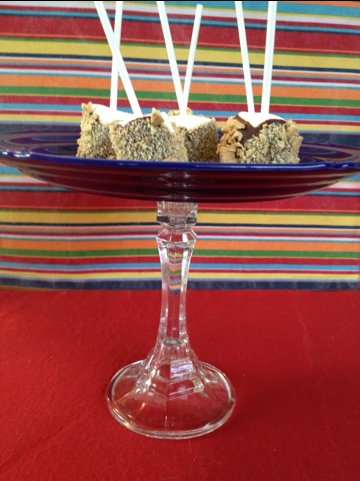
If you put too much batter in the holes, it makes a little edge where the sphere halves meet. Easily broken off though.

If you don’t put enough batter in the holes, the top half of the Cake Ball is not round. Like these…

20120103-220852.jpg

20120103-220903.jpg

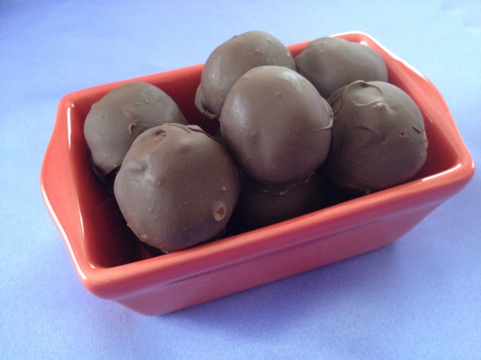
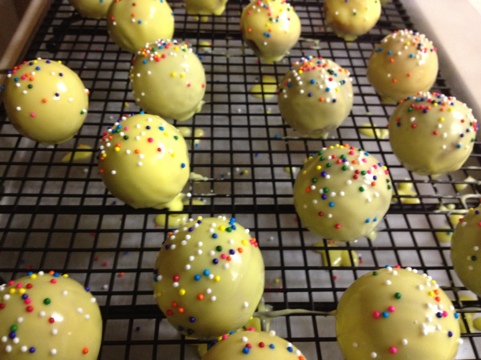
Cake Balls ready for their coating!

20120103-220910.jpg

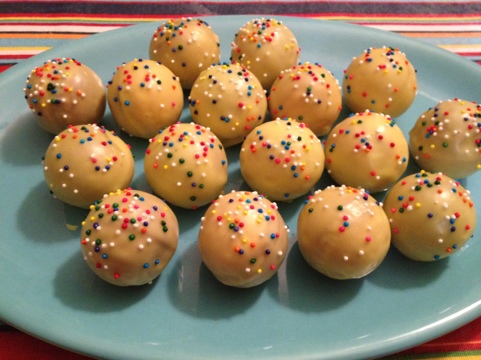
These are lemon flavored, so instead of coating them in candy melts (like you would use for Cake Pops), I wanted to do more of a glaze. Think donut holes!

I used the same glaze I use on my cookies, but I added some lemon extract and lemon juice to make them just as lemony as the cake.

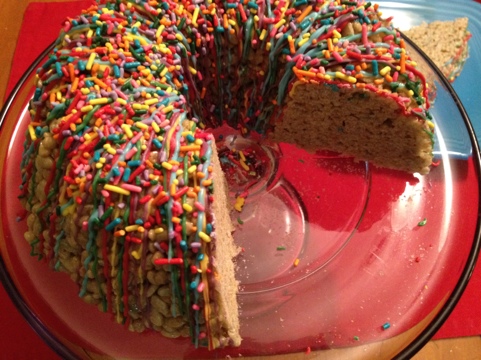
I dropped them in a bowl of glaze, covered them well with a spatula, then fished it out with a fork and tapped off as much as I could. I carefully set it on the wire rack (with wax paper underneath) and gave it some rainbow sprinkles. Sprinkles make everything 549463135487  times better.

20120103-220919.jpg

20120103-220927.jpg

Aren’t they pretty?!

20120103-220942.jpg

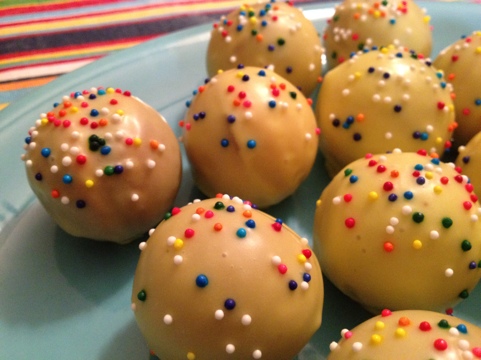
See?! The inside isn’t gooey, just fluffy cake! Very good fluffy cake. A couple people said it reminded them of a donut, especially with the glaze coating.

**Disclaimer – All words above are my views only and I was not paid to talk about the babycakes product. It was a Christmas gift from my brother actually. 🙂 What a good brother I have!

4 Comments

Filed under Cakes

Beer Cookies

These were made for a friend’s friend’s husband’s birthday. The birthday boy loves Sierra Nevada beer, so these were done especially for him. (He also loves Budweiser but I was not brave enough to go there!)

I wanted to stick to the design of the real label as much as possible, so I formed a plan of attack before I did a single thing to the cookies. First I outlined the labels, then dropped some white dots in the center for the “mountain scene.”

20111221-221908.jpg

I wanted to wait for the green outline to dry completely before adding the brown bottle outline, because dark colors tend to bleed.

And bleeding cookies are just as yucky as real blood. Okay not really, but to a cookie decorator it’s just as tragic.

Anyways, so I went ahead and filled the green in next before adding any brown.

20111221-221914.jpg

Once the green was set, I outlined the rest of the bottle and carefully filled it in without letting any of the brown icing touch the still-wet green icing. It did touch on a few. I used those for practice when it came to the next steps…

20111221-221920.jpg

I put these away and waiting until the next day to do the detailing. I didn’t want to mess up the perfect smoothness of the icing! I first drew on the mountains and river, and piped trees and wheat next to it.

Let’s pretend I remembered to take a photo at that stage. It’s the first time I really used my food markers. They’re tricky on my icing because it’s not completely hard like royal icing. More practice is needed!

The text for “Sierra Nevada” was more difficult that I expected… I was nearly crying over these! (Out of frustration, not sadness.) I wanted it curved over the top of the mountain scene, but it didn’t fit. Then I tried curving “Sierra” over the top and “Nevada” under the bottom. Too much curving and I couldn’t get it right… I decided to just bite the bullet and go straight across with both. The harder I tried the sloppier it got. Piping words it hard! You just have to relax and go at it as natural as possible. Once I realized this (and stopped crying) I was more relaxed and they turned out better.

Okay, suspense is killing, here they are!

20111221-221710.jpg

My favorite part is the bottle caps!

Six pack anyone? 🙂

20111221-221929.jpg

1 Comment

Filed under Cookies