Lemon Freezer Pie

This is my mother-in-law’s recipe. Thank you Wendy for letting me share!

I love lemon. Anything lemon. This dessert is simple and not too sweet. Just perfect for a hot summer day.

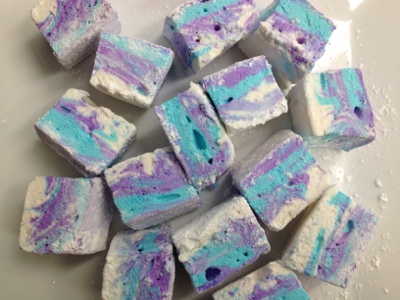
I usually get this just once a year – on my father-in-law’s birthday, because it’s his favorite! My mother-in-law makes it in a pie pan or divides it between 2 small pyrex dishes, but I decided to make it as individual servings. I have these cute little dishes from pampered chef that have their own sealing lids. Everyone gets their own serving and they are easy to transport and eat!

Lemon Freezer Pie adapted from Bon Appetite magazine (years ago)

Ingredients:

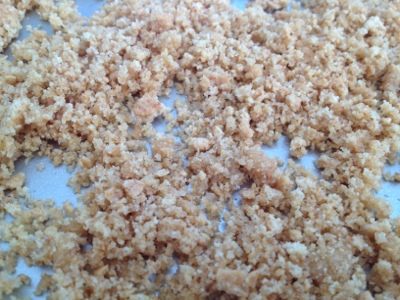
3/4 cup graham cracker crumbs

2 tbsp sugar

2 tbsp melted butter

3 eggs, separated

1/2 cup sugar

1/2 cup lemon juice

1 cup whipped cream (thawed if using the frozen stuff)

Directions:

1. If using fresh whipping cream, whip. Cover and place in the fridge until ready to use.

2. Mix together graham crack crumbs, sugar, and melted butter until crumbles start to stick together. Spread out on a baking sheet and bake at 350 for 3-5 minutes. (If making in a pie pan or other dish, press this into the bottom and up sides and then bake.) Let cool.

20120806-141210.jpg 20120806-141214.jpg

3. Beat egg whites until frothy. Gradually add sugar and beat until soft peaks form. Add yolks one at a time and beat until combined.

20120806-141220.jpg 20120806-141224.jpg

4. Fold in lemon juice and then whipped cream.

5. Divide evenly between single serving dishes. Top with graham crumbles. (Or pour into prepared crust.)

20120806-141229.jpg

6. Freeze overnight before serving. (I made mine in the morning, it froze for about 8-9 hours, and it was perfect by after-dinner time.)

20120806-141234.jpg 

This recipe is always a hit. Try it for your next hot summer day/night get together!

6 Comments

Filed under Misc

Wedding S’more Pop Favors

Today is National S’mores Day!

A friend of a good friend of mine is getting married today and I made her these S’more Pops as her wedding favors!

20120810-064600.jpg

Aren’t the tags just adorable?

20120810-064605.jpg

If you love s’mores, you have GOT to make these. They take no time at all to whip up a few, and I promise they taste sooo much better than you can even imagine they would. I’m pretty much addicted.

How to: (sorry no pics. It’s easy though I swear.)
1. Stand up the mallows on a flat surface.
2. Shove the sticks straight into the tops of the mallows without lifting the mallow from the flat surface. (The stick may be into the mallow crooked, but it should be straight up and therefore sturdier. If you hold the mallow while you shove the stick in, it will end up crooked like 46.5% of the time. Ugh.)
3. Melt chocolate chips or candy melts in the microwave. I did candy melts this time and it seemed easier/smoother. But either works fine and tastes great. By the way, I like to melt in a short drinking glass. It’s taller and less wide so the chocolate is deeper and easier for dipping.
4. Dip the sticked mallow and shake downward to get as much chocolate off as will drip off. Trust me, they’re messy if you skip this step.
5. Roll the chocolated mallow in graham cracker crumbs.
6. Set the mallow “stick up” on wax paper to set up.
Enjoy!!!

6 Comments

Filed under Marshmallows, Misc

Pink Ribbon Party

I made these lovely treats for a woman who just finished radiation for breast cancer and was throwing herself a fabulous party!

The colors were PINK and BROWN. So cute.

Cookies…

20120806-140831.jpg 

20120806-140838.jpg

20120806-140842.jpg

Chocolate Cake Pops…

20120806-140856.jpg 

20120806-140901.jpg

and Marshmallows!!

20120806-141059.jpg

The pink ones were pomegranate, but ended up tasting nothing like pomegranate… I will have to try again one of these days because I love pomegranate!

 20120806-141103.jpg

I decided to try a little piped swirl for these. There were going to be a lot of guests at the party so the smaller the treat the farther it goes! I decided later that I’m glad I didn’t do the swirls with the chocolate mallows ….. :-/

20120806-141108.jpg

These chocolate ones were a million times better than the first chocolate ones I made… dark chocolate is the key!

20120806-140914.jpg

20120806-140920.jpg 

I hope the party was as fabulous as it was sweet!

4 Comments

Filed under Cake Pops, Cookies, Marshmallows

Dairy Free Cupcakes with Vegan Frosting

I made these cupcakes for Baby Jude’s 1st birthday!

20120729-124915.jpg

Due to some dietary restrictions, his treat needed to be dairy free. I bake with milk and butter and all that good stuff usually, so I had to do some research to find a recipe that was able to be made dairy free.

What I found was the BEST THING EVER. A cupcake recipe that makes 2 cupcakes. I know what you’re thinking. Whaaaaaaaat!? And it was easy too. I have a feeling I will be coming back to thing recipe again very soon. Small batches = opportunity for experimentation. Like I did here.

Anyways, back to these cupcakes.

Dairy Free Cupcakes for Twoadapted from How Sweet It Is

Ingredients:

1 egg white

2 tbsp sugar

2 tbsp melted vegan butter (I used Earth Balance)

1 tsp vanilla extract

1/4 cup flour

heaping 1/4 tsp baking powder

pinch of salt

1 1/2 tbsp coconut water

Directions:

1. In a bowl, whisk together egg white and sugar until combined.

2. Stir in melted butter and vanilla.

3. Add flour, baking powder, and salt and stir until completely combined.

4. Stir in the coconut water.

5. Divide equally between 2 cupcake liners in the center of the cupcake pan.

6. Preheat the oven to 350*. (Do not do this first, do this last. While the oven is preheating, the cupcake batter gets to rest in the liners which makes them rise more rounded and beautifully.)

7. Bake for 10-12 minutes.

**Note** This cake recipe can be flavored with anything you want. Substitute the vanilla for almond or lemon extract, or substitute some of the coconut water for pureed strawberries, raspberries, or blackberries.

20120729-123432.jpg

Now for the frosting. I had never made vegan frosting before, but I was confident it wouldn’t be a problem. My regular buttercream recipe is very adaptable so I started there and ended up with something wonderful. We even had a taste test comparison and everyone said tasted the same. Awesome.

20120729-123534.jpg

Easy Vegan Buttercream Frosting

(Enough to frost about 12 cupcakes.)

Ingredients:

1/4 cup vegan butter (I used Earth Balance)

12 oz powdered sugar (if you don’t have a scale, that’s almost 3 cups. Start at 2 and add at the end until it’s the right consistency.)

3 tbsp coconut water or non-dairy creamer

1 tsp vanilla extract

Directions:

With a hand mixer or a stand mixer, mix together all ingredients until fully incorporated. If the mixture is too thin, add powdered sugar a little at a time until it reaches the right consistency.

**Note** This frosting can be flavored with anything you want. Substitute the vanilla for almond or lemon extract, or substitute some of the coconut water/non-dairy creamer for pureed strawberries, raspberries, or blackberries. If it gets to thin, add powdered sugar. If it gets too thick add more coconut water/non-dairy creamer. Easy!

20120729-123524.jpg

15 Comments

Filed under Cakes

Yo Gabba Gabba Cake

Remember these cookies I made for a baby shower last year? Well this little guy just turned 1 on Saturday!!

His favorite thing is Yo Gabba Gabba, so naturally the parents went all out!

After much deliberation, we decided on one large cake for the guests, and one personal little cupcake for Baby Jude! It was his first time having sugar, and we had some dietary restrictions, so I made him a Dairy Free cupcake with Vegan Frosting… recipe will come later this week!

Without further ado, here is the cake I made for Jude!

20120729-113314.jpg

20120729-113319.jpg

On the sides of this tall cake I did each of the characters…

20120729-113324.jpg

20120729-113329.jpg

20120729-113333.jpg

(oops we had a little cake accident next to Toodee up there..)

20120729-113342.jpg

20120729-113346.jpg

20120729-113356.jpg

20120729-113404.jpg

20120729-113407.jpg

20120729-113414.jpg

I surprised the parents and made the inside of the cake like a rainbow cake, but in the colors of each of the characters… the Brobee layer is even striped!

20120729-113429.jpg

20120729-113434.jpg

Poor little guy was exhausted after such a fun party!

20120729-113457.jpg

In case you were wondering, yes there were a lot of colors on this cake!

20120729-123617.jpg

Here is how I made the stripes for the green Brobee layer:

20120729-123637.jpg

Pour a small amount of batter into the center of the pan. With the other color, pour a small amount of batter directly in the center of the pan again, right on top the first circle. Go back to the first color and do this again, right in the center of the circles. As you add more, the layers push out and create the above ringed affect. When you cut into the cake, you will see the vertical stripes! (This can be done with black and white or chocolate and vanilla to look like zebra stripes!)


5 Comments

Filed under Cakes

Mini Krispy Cupcakes

So a couple days ago I stumbled across this recipe for small batch rice krispy treats.

GENIUS!!

All the guilt of making your unhealthy snack is gone because you can make just enough for one little dessert! I thought this would be the perfect way to experiment with different flavors without making a ton of it (just in case it turned out yucky… like that could even happen with rice krispies…)

The recipe suggests pressing them into a muffin/cupcake pan (which makes 2). I decided to do a mini muffin pan instead (which made about 12), because everyone knows that the smaller a dessert is, the cuter it is too!

20120725-131050.jpg

I have to give credit where credit is due here… my husband came up with the idea of dipping the tops in chocolate to make them look like cupcakes! I was going to just press them flat and drizzle them. I guess he’s pretty smart at the chocolate stuff because they turned out great!

I made 2 different kinds!!

Peanut Butter Rice Krispies

Ingredients:

1 tbsp butter

1/4 cup smooth peanut butter

1 cup mini marshmallows

1 1/2 cups rice krispies

Directions:

1. Spray muffin pan with non-stick spray.

2. In a small pot, melt butter, mallows, and peanut butter until smooth.

3. Add the rice krispies straight to the pot and stir until completely coated in goop.

4. Remove pot from heat and carefully scoop krispies into the muffin pan cavaties. Make the tops rounded if you want it to look like a cupcake, or make them flat if you want them to look like little cups.

20120725-130940.jpg

5. Wait. The hardest part, I know.

6. When they are set up (mine took an hour or 2), melt chocolate, white chocolate, or candy melts to dip or drizzle however you like.

20120725-131003.jpg 20120725-131011.jpg

20120725-131017.jpg 20120725-131021.jpg

I had just enough mini mallows to do another small batch…

Chocolate Rice Krispies

Ingredients:

2 tbsp butter

1/4 cup semi-sweet chocolate chips

1 cup mini marshmallows

1 1/2 cups rice krispies

Directions:

1. Spray muffin pan with non-stick spray.

2. In a small pot, melt butter, mallows, and chocolate until smooth.

20120725-130948.jpg

3. Add the rice krispies straight to the pot and stir until completely coated in goop.

4. Remove pot from heat and carefully scoop krispies into the muffin pan cavaties. Make the tops rounded if you want it to look like a cupcake, or make them flat if you want them to look like little cups.

5. Wait. The hardest part, I know.

6. When they are set up (mine took an hour or 2), melt chocolate, white chocolate, or candy melts to dip or drizzle however you like.

20120725-131027.jpg 20120725-131031.jpg

As soon as I can get to the store to buy more mini mallows, I will be making new krispy recipes!

20120725-132225.jpg  20120725-132242.jpg

5 Comments

Filed under Misc

Will you be my…

…flowergirl? …ringbearer?

A good friend of mine is getting married next year and wanted to do something special to ask her little ladies/gent to be her flowergirls/ringbearer. She came up with the idea of doing a large decorated cookie for each of them. I just love how they turned out!

20120723-151622.jpg

20120723-151628.jpg

20120723-151607.jpg

20120723-151601.jpg

20120723-151613.jpg

Here are the girls enjoying their cookies…

20120724-081144.jpg

20120724-081206.jpg

5 Comments

Filed under Cookies

Coconut Star Marshmallows

In these coconut star marshmallows, coconut is definitely the star!

20120715-124403.jpg

Ingredients:

2 packets of powdered unflavored gelatin (I use Knox)

1/2 cup cold coconut water

1/4 cup water

3/4 cup sugar

1/2 cup light corn syrup

1/8 tsp salt

1 tbsp vanilla

some shredded coconut

cornstarch/powdered sugar mixture for dusting (1:1.5 ratio)

Directions:

1. In a microwave safe bowl, whisk together the cold coconut water and gelatin, then let it stand for 5 minutes.

2. Spray a 13×9 pan with non-stick spray, then sprinkle the bottom with shredded coconut. It doesn’t need to be a full layer, but you don’t want too much empty space.

20120713-105759.jpg

3. Pour 1/4 cup corn syrup into your stand mixer. Pour the other 1/4 cup into a medium pot with the water, sugar, and salt. Attach the candy thermometer so that the tip does not touch the bottom of the pot, but instead sits in the mixture. Turn the heat on high and stir occasionally while checking the temperature (you want it to get to about 235-240*).

4. Microwave the gelatin for 30 seconds. Pour it into the stand mixer (fitted with the whisk attachment) with your corn syrup, turn the mixer on low and leave it running.

5. When the sugar mixture reaches 235-240*, slowly pour it into the stand mixer. Turn the speed up to 5 or 6 and set the time for 5 minutes. When the timer goes off, turn the speed up to 8 and set the timer again for 5 minutes. After the timer goes off again, add the vanilla and turn the speed up to the highest setting and set the timer for 2 minutes.

6. After the last timer goes off, turn off the mixer and pour the mallow on top the shredded coconut in the pan. Smooth out the top as much as possible, then dust with cornstarch/powdered sugar mixture and pat it down even.

7. Waiting is the hardest part. Let set up overnight.

8. The next day, place a cutting board on top of the pan and invert to release the mallow. It should come out easily because of the shredded coconut.

20120713-105804.jpg

9. Cut with a small star (or any shape) cookie cutter. Make sure to cut them as close as possible so there isn’t much waste. (Haha, yeah right.. the “waste” tastes just as good!) You may need to clean the cutter every couple of stars because the coconut gets sticky.

20120713-105810.jpg

20120713-105818.jpg

10. Dust the sticky edges of the mallows in more cornstarch/powdered sugar.

20120713-105830.jpg

They are amazing as is, but I wanted to take them a step further…

20120713-105834.jpg

Chocolate time!!

11. Melt chocolate in microwave in 30 second intervals, or in a double broiler. I chose to use my mini crock pot warmer. Once it’s smooth, you’re ready to dip!

Because the mallows were dusty and I didn’t want it to get into my chocolate, I pressed the mallow into the melted chocolate, covered it with chocolate without moving it around. Then I just lifted it out with a fork and tapped it on the edge until all the excess chocolate dripped off. Then used a knife to gently scrape the mallow off the fork onto wax paper.

20120715-125419.jpg

They look a little bumpy, but that’s all the yummy coconut in there!

20120715-124353.jpg

Don’t they look pretty?!

20120715-124359.jpg

The coconut is subtle enough and not too sweet. Absolutely perfect!

3 Comments

Filed under Marshmallows

Pink Baby Shower Cookies

Finally I got to make baby shower cookies for a girl!

Look at the perfection of this pink… I am obsessed.

20120713-101735.jpg

20120713-101740.jpg

I bought the little bow cutter a while back and this is the first (and perfect) opportunity to use it.

20120713-101758.jpg

I did stripes and polka dots onesies with my 2 different color pinks.

20120713-101806.jpg

20120713-101810.jpg

I love these little pink bows!

20120713-101814.jpg

Each favor got one little onesie and one little bow.

20120713-101821.jpg

Oh and look at my new stickers!

20120713-101825.jpg

Thank you to Dion for making a girl baby that I can do pink cookies for! 🙂

4 Comments

Filed under Cookies

Flavored Homemade Mallows

So I have been a little marshmallow crazy lately, thanks to Shauna Sever‘s book Marshmallow Madness. Instead of drawing this out, I thought I would just share some pictures of the many mallows I have been creating lately…

Milk Chocolate (my brother’s favorite):

20120628-083010.jpg

20120628-083019.jpg

Key Lime Pie:

20120628-083037.jpg

Bubblegum (my coworkers’ favorite):

20120628-082945.jpg

20120628-082941.jpg

Vanilla (my husband’s favorite), but pretty colors:

20120628-082925.jpg

20120628-082930.jpg

So far my favorite is funfetti!

20120628-083138.jpg

1 Comment

Filed under Marshmallows