
Sometimes, no words are necessary…

A friend/coworker’s daughter (Mallory!) is leaving for a 6-month exchange program in Australia. Her mom asked me to make her some cookies as a surprise.

I used a teddy bear cutter that came in my Wilton baby set (top cookie) but I turned it upsidedown to make my koalas. Koalas have big ears ya know!
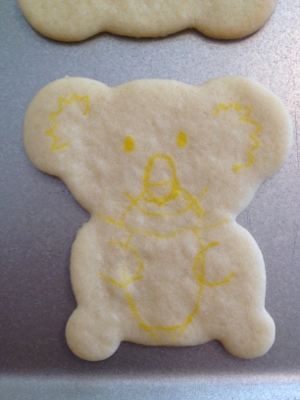
To get an idea of my design, I first sketched it out on the cookie with a yellow food color marker.


Then I outlined all the cookies in black. I will be doing this more often, it made my life 1000 times easier.
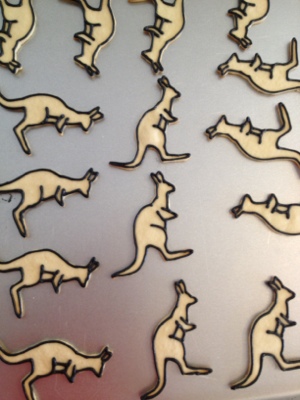
I also made some kangaroos!

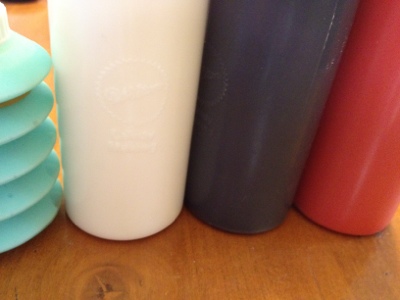
I teased everyone on fb with this photo of my colors… I didn’t realize how many things could be made with browns and greys until everyone started guessing!

I filled in my little koalas’ bellies, chins, and ears with light grey and let it dry a bit.

Then I came back and filled in the grey. The ears were tricky because I didn’t want to lose the “fluff” definition I made with my black.

So cute already!

Once the grey had dried a little I added some eyes and filled in the noses.

The kangaroos got filled in with brown and light tan for the bellies.

I added a little mouth to a couple of the koalas.
Bye Mallory!! You’re going to have an amazing time!
Filed under Cookies
These cupcakes are life changing.
Life changing. Seriously.
I’m going to just get right into it.
Snickers Cupcakes with Chocolate Rose Frosting
cupcake ingredients:
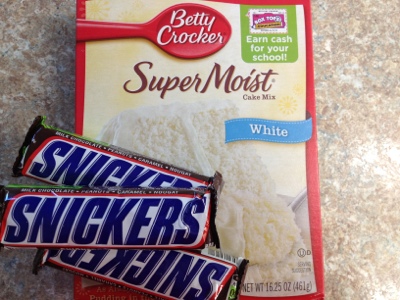
1 box white cake + water, oil, and eggs called for
1/4 cup brown sugar
3-4 snickers bars
frosting ingredients:
1 stick of butter, cut into pieces
1/4 cup cocoa powder
3 tbsp + 1tsp milk
2 tsp vanilla
1 lb (16 oz) powdered sugar
Directions:
1. Cut snickers into small pieces, spread out on a glass plate, and put into the freezer for 30 minutes. This will keep them from melting when you bake the cupcakes.

2. Mix together the water, oil, and 1/4 cup brown sugar. Slowly add the cake mix until fully combined, then add the eggs.
*For the record, I forgot the last part. Yup, I forgot eggs. They still came out great, but they kind of crumble apart as you try to eat it. Tells me that if you are vegan, you can make these without eggs and they’re still amazing!!**

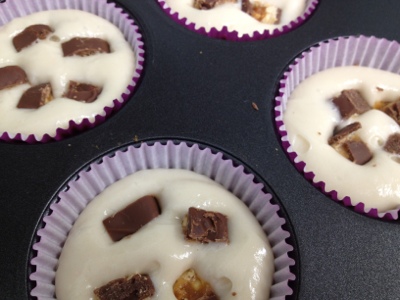
3. Use a cookie scoop or a 1/4 cup to scoop batter into your cupcake liners.

4. Remove the snickers pieces from the freezer and shove a few into each cupcake.
5. Bake at 350* for 18-20 minutes.

Mine came out puffy but sank in a bit after cooling. I don’t know if this is because I forgot the eggs or if they will do that anyway, but I thought I would mention it just in case it happens to anyone else.

6. To make the frosting, mix together the butter and cocoa powder, adding the milk slowly to make a fudgy paste. Add the vanilla, then slowly mix in the powdered sugar.
This frosting is not too chocolaty, because the cupcake is really sweet and rich already.
I took a couple photos to show how I made the frosting roses. You basically start in the center and go around in a circle while squeezing out frosting. When you get to the outside, stop squeezing and pull to stretch the end of the rose.


The insides are gooey and rich, and absolutely perfect!

Filed under Cakes, Uncategorized
Ever since the first time I tried this wonderful grape salad, I have been hooked. I got the recipe from my mom, who got it from a coworker/friend (hi Jeri!!).
Even if you aren’t the biggest fan of some of the ingredients, I urge you to try this wonderful recipe, you won’t be sorry!

Grape Salad
Ingredients:

lots of seedless grapes, both red and green (I know that’s not a measurement, but it’s not exact science here. I bought 3 bags.)
1 jar of marshmallow creme (7 oz)
1 brick cream cheese (I like to use the 1/3 less fat kind)
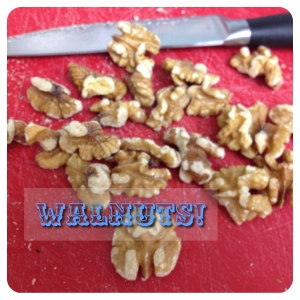
about a cup of chopped walnuts
about 6-8 oz shredded coconut
Directions:
1. Pick apart your grapes. Wash them well in a strainer, then spin dry in a salad spinner. (If you don’t have a salad spinner you might want to drain them extra long or pat them somewhat dry with paper towels.)

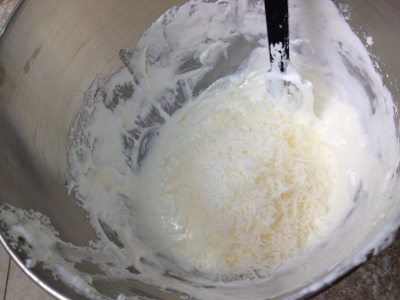
2. Blend together marshmallow creme and cream cheese. I used my Sheila because I am lazy. Mix coconut and walnuts in by hand.

3. Plop the goop on your grapes and stir stir stir. If they are really goopy, you might want to add more grapes. Add more walnuts or coconut to your taste.

Enjoy!!

Filed under Misc
There are a number of tools that I use when I bake and create that I couldn’t live without.
I thought I would just share a few of them today for a couple reasons. Sometimes you don’t realize you’re doing something the hard way until you see someone else doing it their way. Or you don’t even know that certain tools exist until you hear about it from someone else. I’m sure there are easier ways of doing some of the things I do.. if you have any ideas for me please feel free to share!
A lot of my items are Pampered Chef. I am spoiled when it comes to kitchen gadgets and I just LOVE my Pampered Chef items. Speaking of, I am having a party next week so if you are interested in ordering anything let me know and I can direct you to my wonderful consultant’s site!
These are in no particular order…
Mini Spatula (Pampered Chef). I have 2 of these. They’re the perfect size to lift my rolled cutout cookies to place on my cookie sheet to bake. The second one I use to move the cookies from the sheet to the drying rack without cross contaminating my cooked vs. uncooked.

Toothpicks and Boo Boo Sticks. Toothpicks are a bakers #1 tool. You test your cake with them, use them to add gel food coloring to cakes and frostings, to poke, push, swirl, pop, and scrape your cookie icing… the uses are endless. I recently purchased a few boo boo sticks from Karen’s Cookies. The sharp end I use in every way I use my toothpicks, except it never gets dull or splinters into my icing. The other end is a perfect icing scraper for when you make mistakes or need to start over.


Squeeze Bottles (some Pampered Chef). A few years ago I went to a Pampered Chef party and saw these little accordian squeeze bottles. The consultant said they are great but a pain to clean… but she had put buttercream in hers. Somehow it hit me to use them for my cookie icing. See before that, I used to have my icing in a small bowl and spread the icing on with a cheese spreader or small knife. Turning to these bottles made the whole process faster and more fun! Back then I also didn’t flood my cookies. I would just squeeze the icing on, then spread it around with a little knife. After I learned about flooding, I realized that everyone uses squeeze bottles. And I thought I was a genuis for thinking of it. Oh well… Michael’s also sells squeeze bottles. I like their big bottles, but their small bottle have these teeeeny necks and it’s impossible to fill them without making a mess.

In case you don’t know what flooding is, it’s when you outline a cookie first with a thicker icing (I actually use buttercream for this part) then you “flood” or fill-in the cookie with the thinner icing. Gravity is your friend here, and the icing dries smooth and perfect. Everyone will ask HOW did you get it so smooth?!
Marble Rolling Pin. I LOVE my rolling pin. Most cookie bakers use wood or plastic pins because the weight of the pin can make it hard to get an even width of dough. Lots of bakers also use tools to ensure the dough is even. Some use bands (think rubber bands) that you slip on the pin, other use wood slats on the sides (like those paint stirrers you get at Home Depot), and others use special boards to roll on. I think I just know my width from so much practice, but I never feel the need for any of these things. Maybe someone wants to try to change my mind? What do YOU use?
Cling Wrap and Parchment Paper. I use cling wrap when I roll my cookies. I lay it over my dough and then roll roll roll. It keeps the dough from sticking to my pin and helps make it smooth. Parchment paper goes down on the cookie sheets and then the cookies are baked on it. Without it, the cookies stick (just a little bit) to the pan. I have never broken a single cookie since I started using parchment paper. And it makes clean-up easier!
Flour Shaker (Pampered Chef). When I first saw this little shaker, I thought it was silly. Then one day I realized that the way I was flouring my surface was silly! (Hand in flour bag not so pretty.) It shakes lightly or heavy, depending on how hard I shake it and what I need. And my hands stay clean(er).
My Sheila. My KitchenAid is the best investment I could have ever made. I would forsake all other items on this list for my beloved mixer. If you love to bake, save up and do everything you have to do to get yourself one. It will change your life!
There are of course many other tools that I use, but these are the most important items and those items that probably set me apart. If you use something unique, I’d love to hear about it!
Filed under Uncategorized
My brother and I love candy.
This love of candy is one of the reasons he makes an excellent Target shopping partner. (I have gone to Target with a number of different people and I have discovered that not everyone shops Target the same way. My brother and I are good together at Target because we understand the most important part of the store is the 3 aisles of candy in the far back corner near the seasonal section.)
I recently had a poll on facebook asking people to rate these in order from MOST favorite to LEAST favorite: cookies, cake, ice cream, candy, pie. (For the record, mine is 1. Candy 2. Ice Cream 3. Cake 4. Cookies 5. Pie) It was fun seeing everyone’s answers!
Anywhoo… on one of my brother’s candy trips to Target, he disovered this:
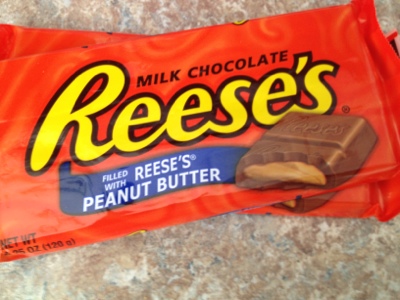
It’s basically like a Hershey bar except each individual bar is a separate Reese’s.

I knew I had to make something with them, and this is what I came up with!
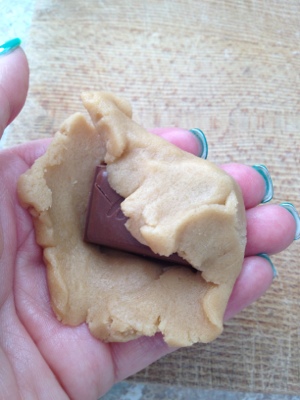
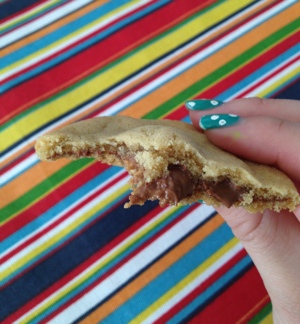
It’s a Peanut Butter cookie dough wrapped around an individual Reese’s bar, then baked long and slow so that they are soft, chewy, and melty chocolate on the inside!
Peanut Butter Surprise Cookies – adapted from Simply Recipes
Ingredients:
1 stick butter
1/2 cup sugar
1/2 cup packed brown sugar
1/2 cup peanut butter
1 egg
1 1/4 cup flour
3/4 tsp baking soda
1/2 tsp baking powder
1/4 tsp salt
Directions:
1. Beat butter for 2 minutes. Add sugars and beat for 2 minutes more, scraping sides of bowl halfway through. Add peanut butter and egg and mix until combined. In a separate bowl, whisk together flour, baking soda, baking powder, and salt. Slowly add to sugar mixture until completely combined. Let chill for at least 2 hours.


2. Cut apart Reeses bars. Get a ball of dough about 2-3 tablespoons and flatten with your fingers. Put the little Reeses bar inside and wrap it up all snug. I sort of rolled it into a little log shape after the bar was completely covered.

3. Space the cookie logs about 2-3 inches apart on a parchment lined cookie sheet, they will spread quite a bit.
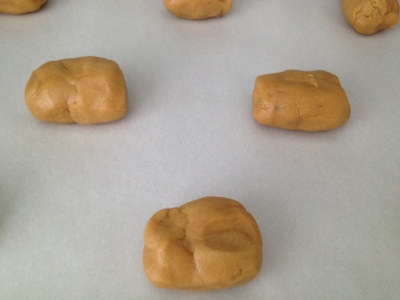
4. Bake at 300* for 15 minutes. Let cool for about 15 minutes on the pan before moving to a drying rack. They will come out of the oven a little poofy so they need to set and settle as they cool.

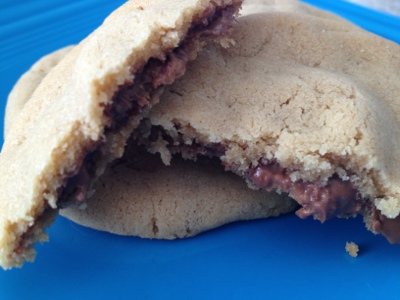
These might be the best cookies I’ve ever had. Especially if you eat it when it’s still warm!
Filed under Cookies
A while back I made these butterflies for a special little girl.
With those as inspiration, I made these for another little girl who was turning 1!


They were left unwrapped so that they could be enjoyed by the party guests.
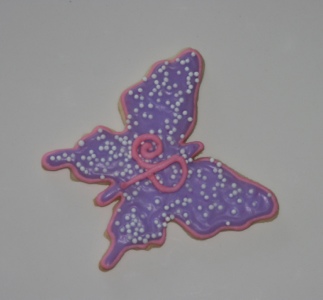
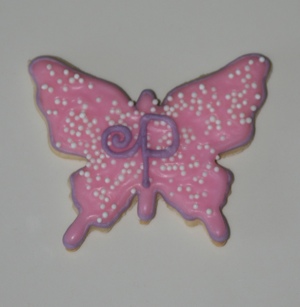
Sometimes simple and sprinkles is all you need!
If you’ve been around here for a significant amount of time, you know how I feel about chocolate. I’ve made brownies twice. This time and this time.
But for some reason I have been wanting to make some brownies lately. I got the perfect opportunity when a friend asked me to bring dessert over for a small dinner group. It just so happens that the favorite candy of this group is Reese’s.

I compiled a few different ideas and ingreients from different recipes to make my very own recipe. You can find my inspiration here, here, and here.
Cake Mix Peanut Butter Brownies – recipe by me!
Ingredients:
1 box chocolate cake mix
1/4 cup vegetable oil
1/2 cup milk
1 egg
1 14oz can sweetened condensed milk
1/2 cup creamy peanut butter
1 package Reese’s cup minis
Directions:
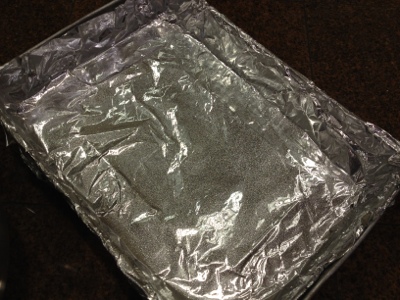
1. Preheat oven 350*. Line 13×9 pan with foil then spray with non-stick spray.
2. Mix together cake mix, oil, milk, and egg. Spread half of the batter into the bottom of the pan.


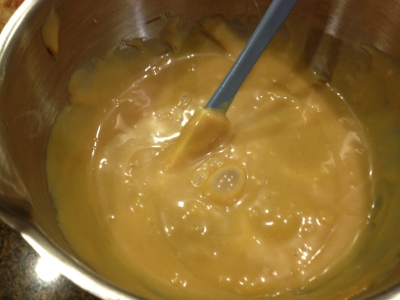
3. In a separate bowl mix together sweetened condensed milk and peanut butter. Pour and spread evenly over the cake batter.

4. Cut the Reese’s minis in half and distribute over the glorious peanut butter mixture.


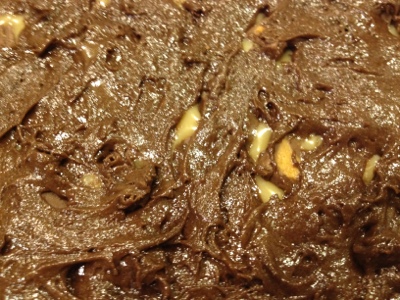
5. Dollop the remaining cake mix over the Reese’s and carefully spread it out as much as possible.

Peekaboo Reese’s!
6. Bake for 25 minutes and let cool completely.
7. Remove from pan by lifting out with the foil. Cut into squares. Eat. Share.

Look how cute this plate is that I got from Target! Perfect for the summer…


These are moist, not too rich, and perfectly peanut buttery!

Filed under Brownies
I am OBSESSED with making marshmallows! If you missed the first post or the last post, be sure to check them out!
This recipe is from Shauna Server’s book Marshmallow Madness.
Follow the recipe for Basic Vanilla Marshmallows.
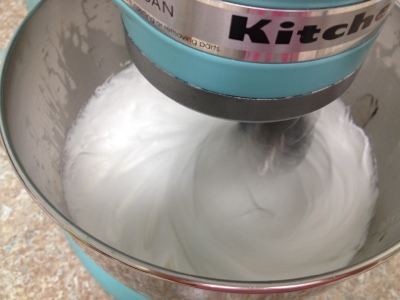
At the end of all the whipping, carefully fold in 1/4 cup sifted dry funfetti cake mix. (You can use white, vanilla, or yellow cake mix if you don’t have funfetti.) My funfetti mix didn’t have enough sprinkles, so I added some more. (If you use regular cake mix you’ll want to add about 2 tbsp sprinkles.) Just be careful not to mix it too much or the sprinkles will melt and make the whole thing look muddy.


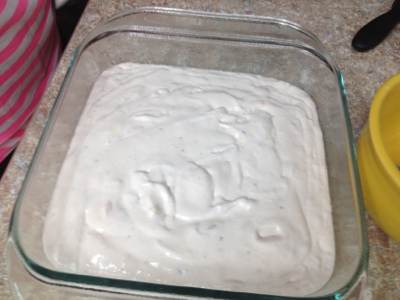


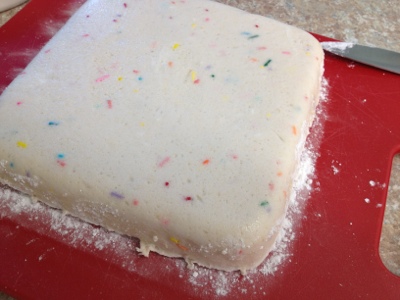
Don’t sprinkles just make everything better?! So pretty!

When I made these, I cut out the last 2 minutes of whipping on high speed (because I thought that’s what the recipe said) but you can go the full time. Mine just came out more smooth and melt-in-your-mouth and less marshmallowy squishy. Hope that makes sense. They were still amazing though so it doesn’t really matter. 🙂
Unfortunately the picture above is the last one I got of these marshmallows. We ate them all so fast I was barely able to share and didn’t get a chance to take some good pictures! So far these are my favorite marshmallows I have made. So there will be a ‘next time’ and then I will come back and add better photos!
Filed under Marshmallows
A young lad in a family that we are very close to graduated high school (from my high school!) last week. He is the youngest son of my old swim coach. I offered to make cookies for his graduation party, and his mom gladly accepted.
I was discussing designs with my mom, and I knew I wanted to do something swimming related because the entire family was very immersed in the swimming world. My mom told me that he was “not that into swimming” and that it was mostly the older brother who had been interested in it. She said the younger only did it because his dad was the coach. I thought she was crazy, but I had kind of put off the idea anyway…
Then came the high school swim team’s awards night. My swim coach was retiring after 18 years of coaching high school, so a sort-of surprise party was arranged to bring in as many old swimmers as possible and flood the audience at the awards night. (I made and brought 6 batches of kettle corn for the event!) It was there that his youngest son, who’s “not that into swimming” won award after award, and it was obvious that he was one of (if not the) fastest/best guy on the team. I concluded that my mom was undoubtably wrong and that I was doing some sort of swimming cookies after all.
(When I told the graduate this story, he laughed and said he was more into swimming than his older brother!)
I ended up just doing one swimming themed cookie, because too many designs would have made me crazy. These are my high school colors, with a “splash” of “pool” blue.
I made graduation caps, stars, circles with our high school initials on them, and fancy plaques with the graduate’s name.

At my high school, the girls wear red robes and the boys wear black.

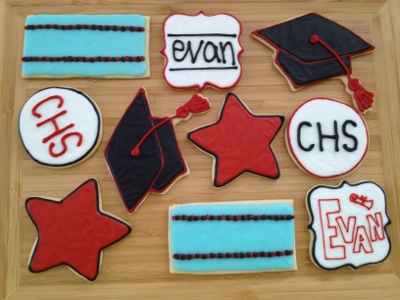
Here are the swimming cookies. For those not immersed in the swimming world, the red and black dots are lane lines that are strung the length of the pool to separate the lanes. At my high school, our swim team had a tight budget, so our school colors lane lines only came out for special occasions like a swim meet.

Here are all the cookies on the platter. I love how the blue gives it a pop!
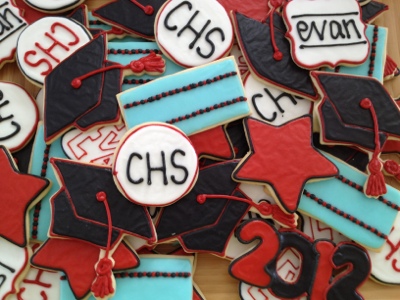
Oh yeah and I did one 2012 cookie. I wanted to do more but I thought it would be too fragile.

Go Lancers!


