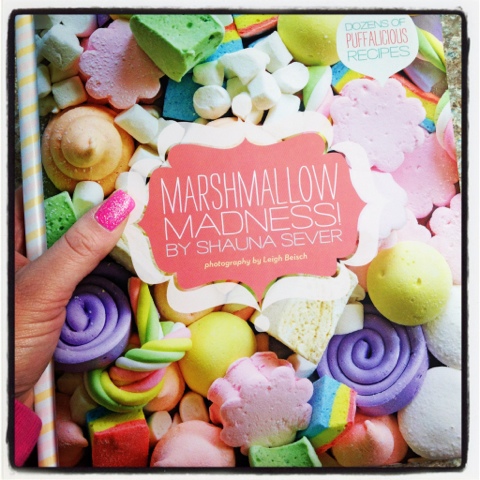
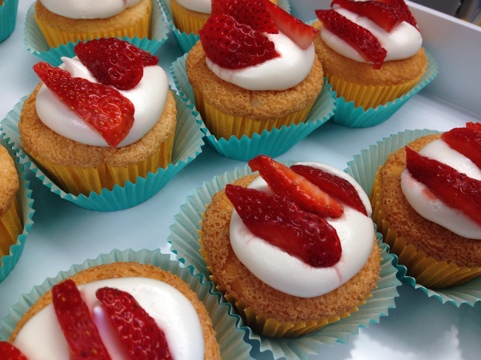
A while back, I bought this book:

Marshmallow Madness by Shauna Sever
The book is super adorable. It’s smallish and has a squishy cover.. and is packed full of gorgeous photos of all these amazing sounding recipes for homemade marshmallows!
The basic recipe & technique flows throughout, so once you get the procedure down you’re ready to get crazy with flavors. My bestie got just as excited about the book as me when I showed it to her, so we decided as we go through the recipes, we would make them together.

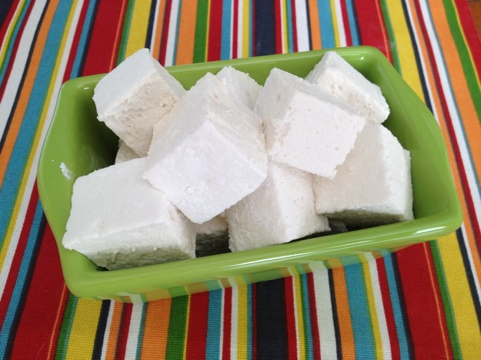
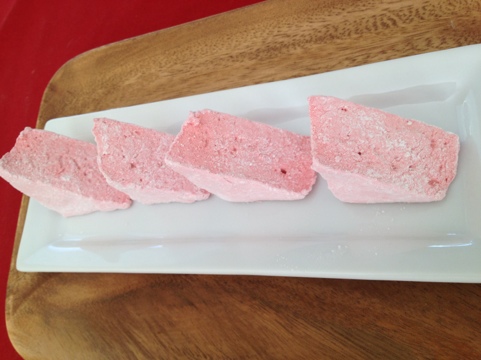
For our first go, we wanted to make basic vanilla mallows for a couple of reasons. Firstly because “fundamentals are the building blocks of fun.” Secondly because Shauna herself loves it more than any of her other wild crazy fun flavors!
I can see why Shauna likes the vanilla ones. So simple yet so amazing! Next time I will add the optional vanilla bean to add some extra vanilla umph!
It turned out to be a quick and easy process (minus having to wait overnight to cut and taste them), so we decided to make a second flavor too. Details on how to make these Black Cherry mallows coming soon!

Shauna was kind enough to let me share her recipe.. there are a few others on her blog, so go check it out!
Before we get started, there are a few things you NEED to have in order to make these. #1 is a candy thermometer. They aren’t expensive, so if you are dying to make these, go get one!! #2 is a a stand mixer. Obviously not necessary, but you really don’t want to stand and whip these with a hand mixer… with a stand mixer it takes 15 minutes, I can only imagine how long it would take with a hand mixer.
*The first time I made these, I didn’t take any photos. I was too busy concentrating on getting the recipe right! The pictures of the steps below are of funfetti marshmallows I made, which is the same recipe up until the very end. You’ll see when we get there.
Classic Vanilla Marshmallows (from Marshmallow Madness by Shauna Sever)

Ingredients:
2 packets powdered unflavored gelatin (I used Knox) – about 4 1/2 tsp
1/2 cup cold water
3/4 cup sugar
1/2 cup light corn syrup, divided
1/4 cup water
1/8 tsp salt (I don’t have a measuring spoon this small so I just guestimated with my 1/4 tsp)
2 tsp vanilla
**1 cup corn starch
**1 1/2 cups powdered sugar
Directions:
1. Lightly spray a pan with non-stick cooking spray. The recipe says to use an 8×8, but really you can use whatever you want. The 8×8 makes the mallows about an inch to an inch and a half thick. I imagine a 13×9 would make much thinner mallows.
2. Sift together the corn starch and powdered sugar. If you don’t have a sifter (like me) a whisk is fine. The cornstarch can be kind of chunky (weird word choice but I couldn’t think of anything better) so you want to break it up and mix it as best as possible. **The amounts above yeild way more than you need for just 1 recipe. You need this for almost any mallow recipe, so it’s a good idea to just make this much and save it for later. If you don’t want to you can cut it down by 1/3 or 1/4 and you’ll still have enough.
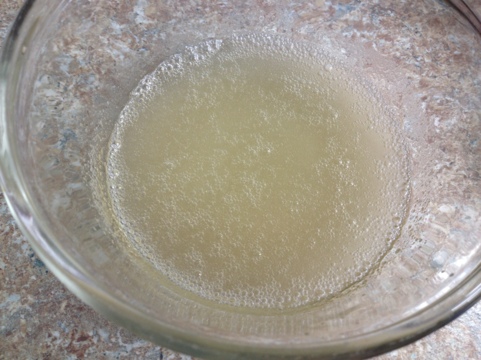
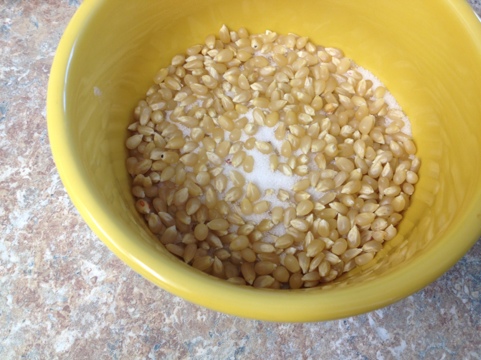
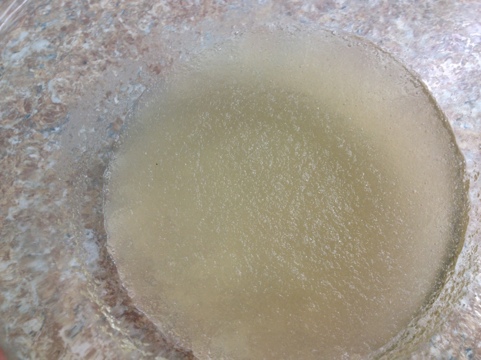
3. Whisk together the powdered gelatin and cold water (in a microwave safe bowl) until the powder is dissolved, then let sit for 5 minutes.

(The picture below is after 5 minutes. It’s hard to tell but it kind of solidifies… like gelatin…)
4. While the gelatin is sitting, combine 1/4 cup of corn syrup, the sugar, 1/4 cup water, and salt in a medium pot. (I learned my second time making these that a medium pot heats the sugar faster than a small pot.) Attach the candy thermometer so that the tip does not touch the bottom of the pot, but instead sits in the mixture. Turn the heat on high and stir occasionally while checking the temperature (you want it to get to about 235-240*).

5. Put the other 1/4 cup corn syrup in the mixer. By now the gelatin should have been sitting for about 5 minutes. Put it in the microwave for about 30 seconds, until it’s completely melted. Pour this in the mixer with the corn syrup and turn the mixer on low.

6. When the sugar mixture reaches about 235-240*, pull it off the stove and slowly pour it into the running mixer. (The spill shield is perfect for this.)


This photo got steamy cuz I took it right after I added all of the hot syrup.

7. Once all of the sugar mixture is added, turn the mixer up to speed 5-6 and set the timer for 5 minutes. When the timer goes off, turn the mixer up to speed 8 and set the timer for another 5 minutes. The first picture below is after the first 5 minutes, the second is after the second 5 minutes.

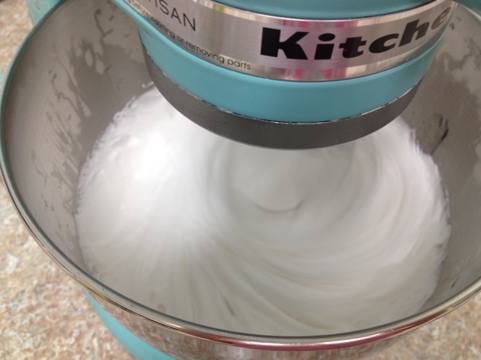
8. When the timer goes off again, add your vanilla then turn the mixer up to the highest speed for about 2 minutes. Your mallow mixture should be 2-3 times expanded and white in color.
9. Turn off the mixer and pour your mallow goop into the prepared pan. (It’s pretty sticky so you’ll need to scrape and scoop with a spatula of some sort.) Using an offset spatula helps push it into the corners without getting your fingers sticky. Smooth it out as best as possible.
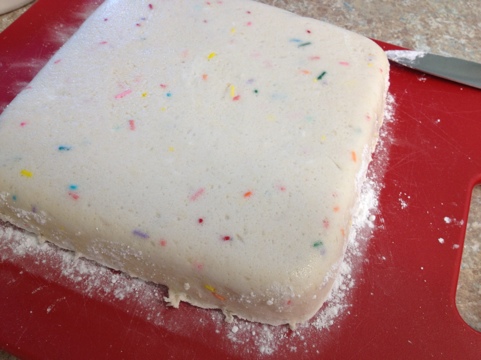
**The rest of the pictures are of funfetti marshmallows. The steps are the same so just ignore the sprinkles. Details on how to make funfetti mallows coming soon!)


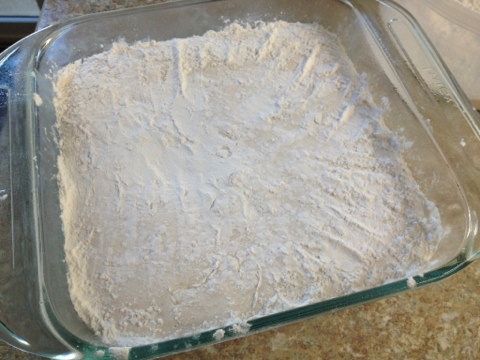
10. Sprinkle the top of your mallow mixture with your powdered sugar mix, then flatten with your hands. Let it rest/dry out overnight (uncovered) in a cool dark spot.
11. The next day, use a knife to separate the mallow from the sides of the pan.
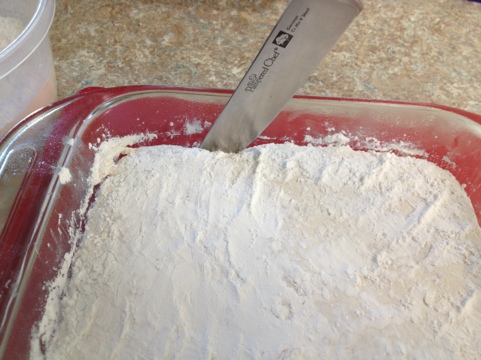
12. Dust a cutting board or other flat surface with your powdered sugar mixture, then get the mallow out of your pan. It should easily come out in one piece, but it might need a nudge or pull with your fingers.

13. Cut the mallows however you’d like (squares are easy) and dust the cut (aka sticky) sides in more powder. I found it was easiest to just throw a couple cut pieces in the bowl of powdered sugar and stir it around to coat, then shake off any excess.

14. Store mallows spread out and uncovered for the first couple days so that they don’t regain moisture and stick together.
The whole process seems daunting but it’s actually easy and fast. You can do it!!