Monthly Archives: April 2013

Angel Food Whoopie Pies

My mommy loves angel food cake. For the past couple years I have made something angel-food-cake related for her birthday. See here and here for past posts.

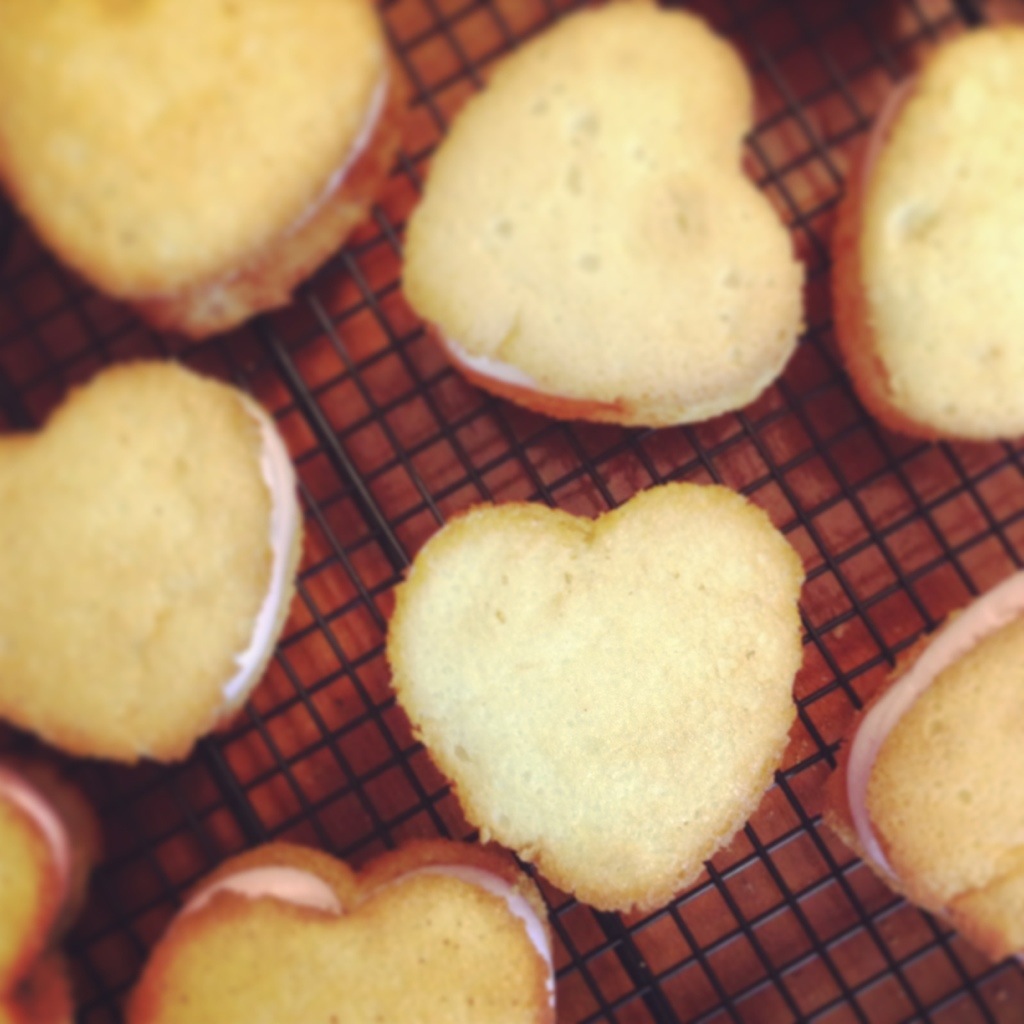
This year I used my heart whoppie pie pan to make little love cakes.

I used the same recipe as last year for the frosting, but switched it up to make it strawberry flavored. Aaaaand I kind of over-whipped it so it turned out more like a strawberry whipped cream and less like strawberry marshmallow.

20130425-142454.jpg

Angel Food Whoopie Pies

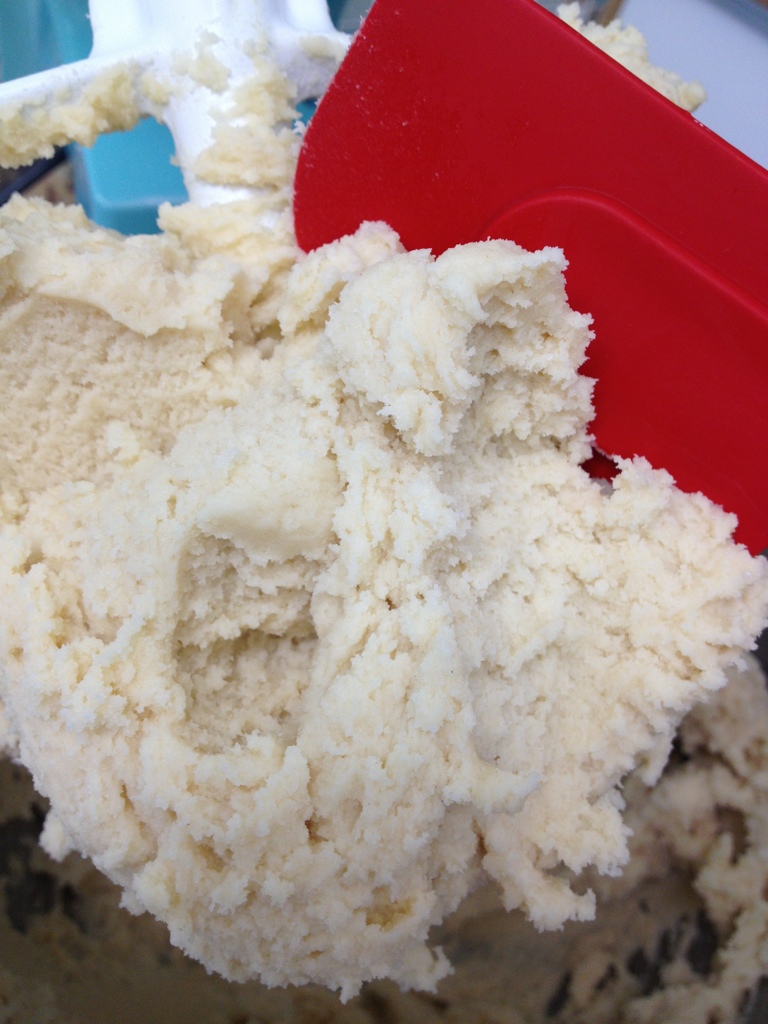
I used a boxed cake mix. It’s too easy, all you have to add is water. I prepared the batter according to the box directions, then used a medium cookie scoop to dollop batter into each well of my whoopie pie pan.

20130425-142654.jpg

I tapped it on the counter a few times and jiggled it side to side until it settled into the lumps of the hearts.

20130425-142701.jpg

Bake at 375* for 10 minutes.

I didn’t want them to fall too much, so once I took it out of the oven I turned the pan upside-down on top of a couple drink glasses. Probably not necessary, but it couldn’t hurt.

20130425-142719.jpg

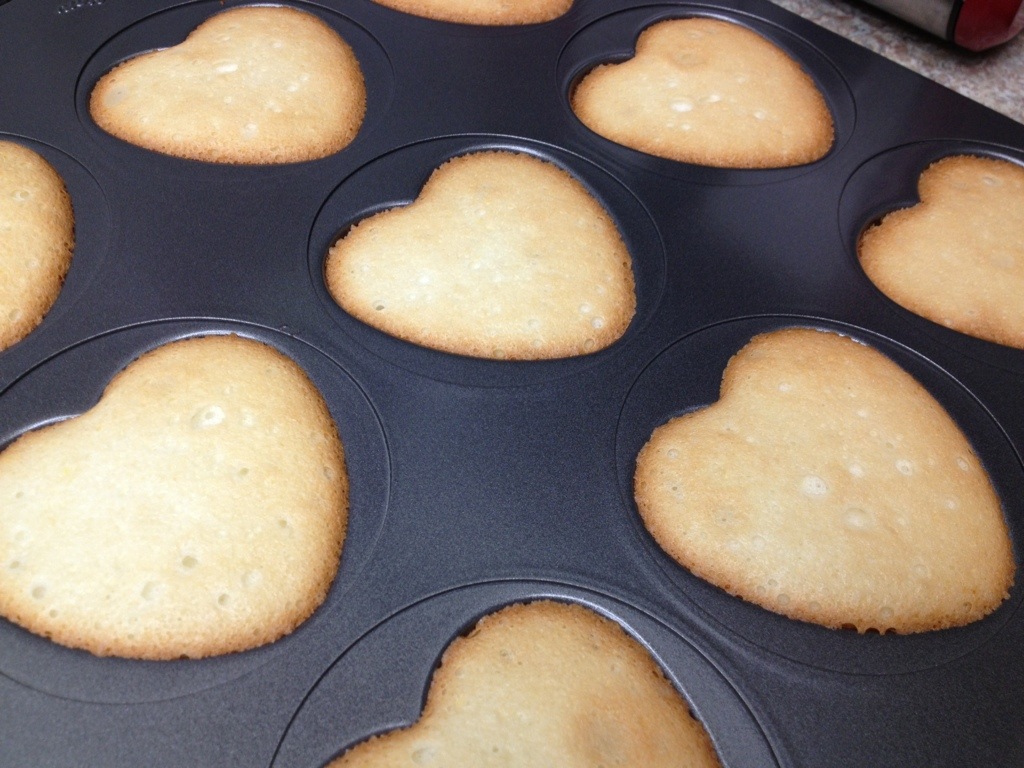
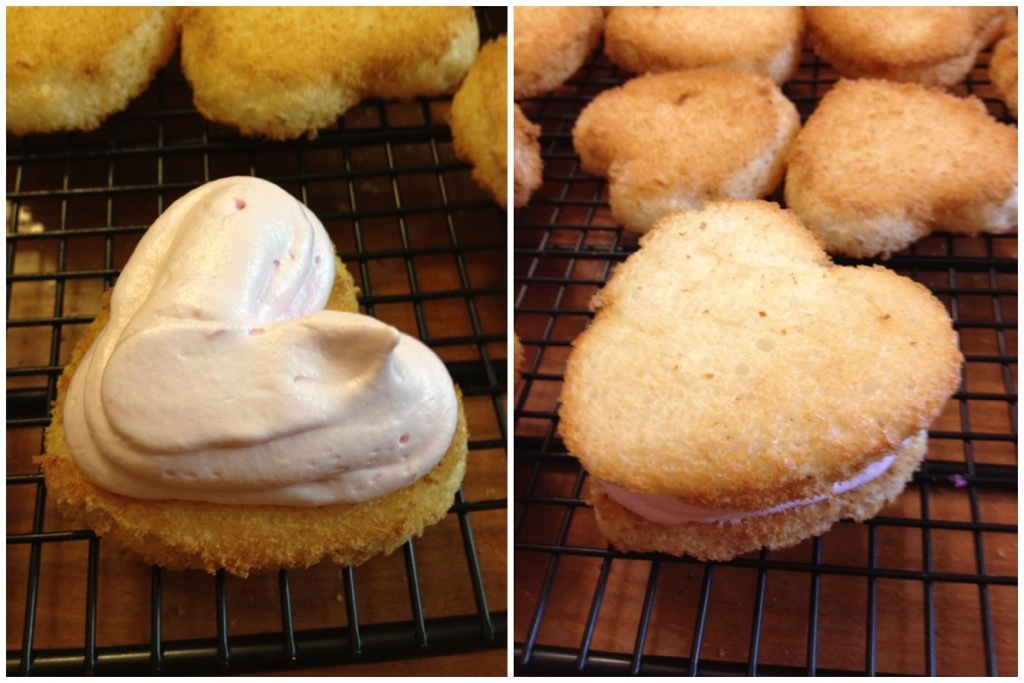
Once the pan was cool, I used a butter knife to carefully cut around the edge of each heart. Once the edges were free, they were pretty easy to pop out. Lay bottoms up on a cooling rack until ready to frost.

20130425-142637.jpg

Strawberry Whipped Frosting – adapted from this frosting recipe

Ingredients:

Some fresh strawberries ( I used about a basket, but it made a lot so I probably only needed a few)

1 cup granulated sugar

about 5 tbsp water

1/4 tsp cream of tartar

2 egg whites

1 tsp vanilla extract

Directions:

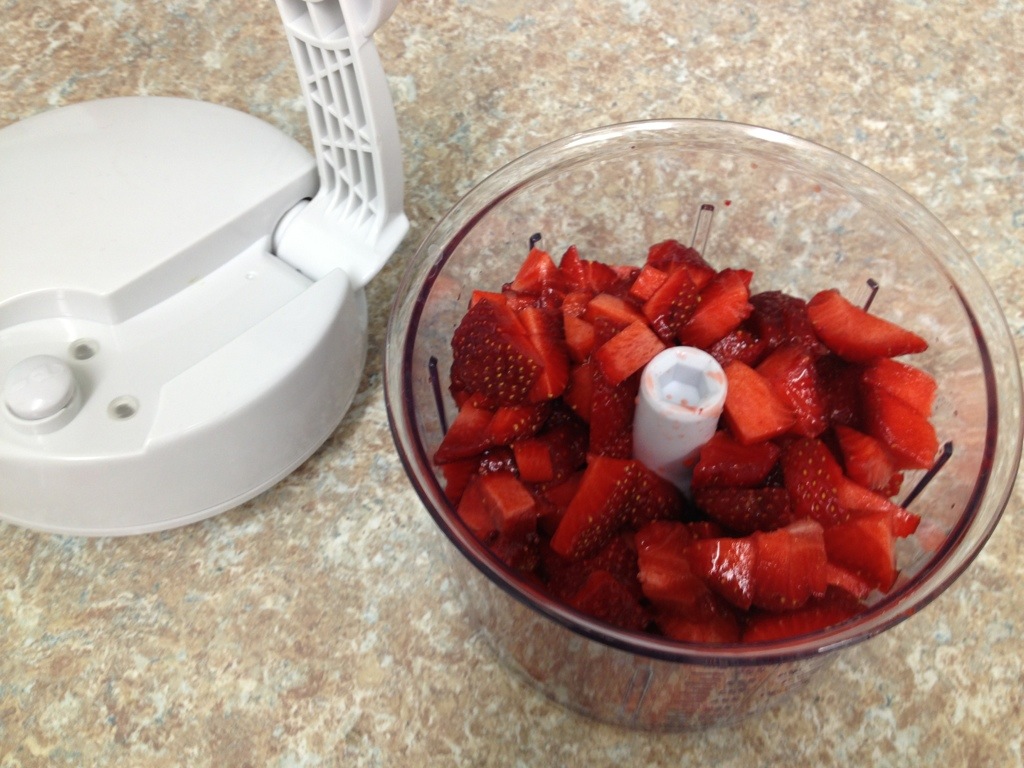
1. Clean, hull, and cut up the strawberries, then puree. I used a manual food processor to pulse them as much as possible. I guess you could blend them, but I didn’t mind a little bit of chunks, it was going to get strained anyway.

20130425-142707.jpg

20130425-142713.jpg

2. Cook the strawberry puree in a small pot on low heat for about 30 minutes. I just wanted to reduce it a little… I could have cooked it longer, but I probably could have also skipped this step. I like to think it made a difference so just play along with me. 🙂

3. Once the strawberry goop cooled down a bit, I poured it through a strainer to get rid of the big chunks that were still left. Then I poured some into a measuring cup about 1/2 way up to the 1/3 cup mark. This clearly isn’t exact science here… a little more or a little less won’t hurt anything. Pour any remaining goop into a small jar to store in the fridge for later use. (I’m thinking ice cream topping!!)

4. Add enough water to bring it to 1/3 cup and pour back into the small pot. Add the granulated sugar and cream of tartar, and cook on medium heat until sugar is dissolved and the mixture is bubbly.

20130425-142729.jpg

5. While the syrup is cooking, whip egg whites and vanilla to soft peaks. (Use the whisk attachment if using a stand mixer.)

6. When syrup is bubbly, slowly add to egg whites while mixer is running. Whip for about 7-10 minutes or until stiff peaks form. If you err on the side of less stiff, it will be more of a marshmallow texture. If you over whip (like I did) it will be closer to a whipped cream texture. Either would pair well with these!

20130425-150537.jpg

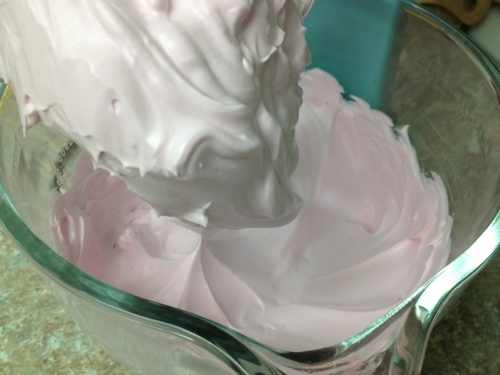
OH! and I also added a tad of hot pink coloring because it wasn’t pink enough from just the strawberries for my liking. 🙂

20130425-142737.jpg

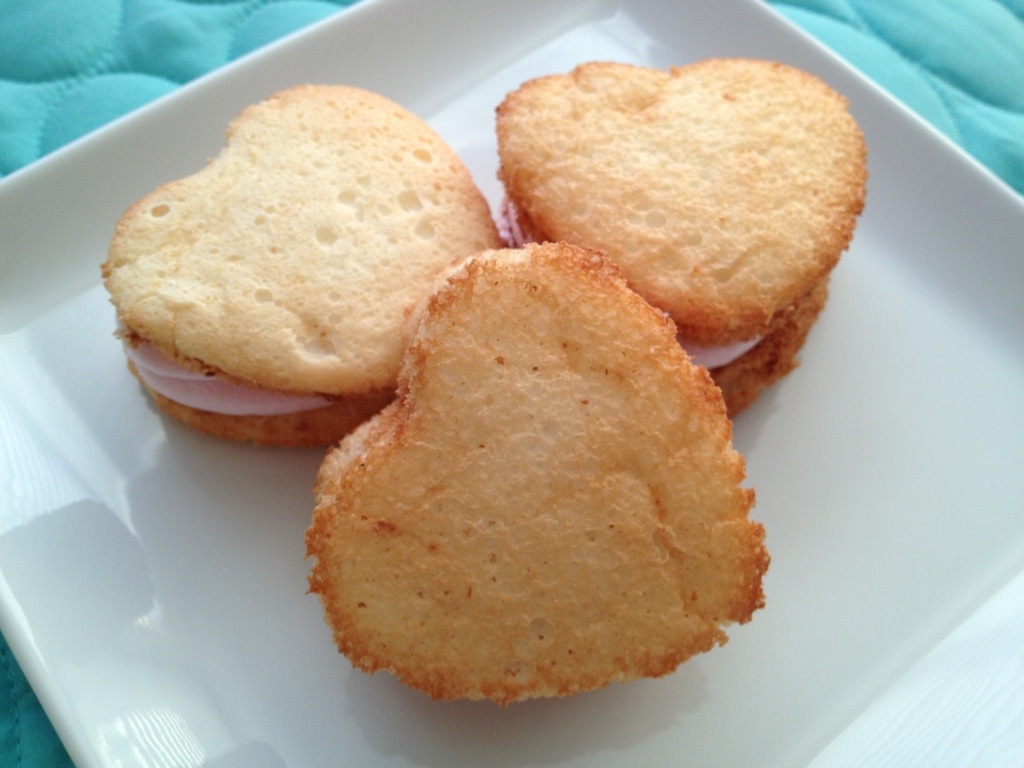
7. Put whipped frosting into a piping bag with a large tip (star or round would work fine). Squeeze onto one side of the whoopie pies and top with the other side. If you opted for the softer more marshmallowy texture for the frosting, let it sit for about 30 seconds before you top it with the other piece of whoopie pie. You don’t want to squish your frosting too much.

20130425-142624.jpg

These were YUMMY. Because angel food cake is typically tall and fluffy, the shortness of these whoopie pies made them a little denser and stickier. It was almost like taking a piece of angel food cake and squishing it up before biting into it. 🙂

20130425-142500.jpg

The strawberry frosting was subtle. Next time I would add even more strawberry. I was just nervous about messing with the liquids in this recipe too much.

20130425-142448.jpg

I only made about a dozen of these as whoopie pies (the rest were just regular cupcakes). It was kind of a pain because angel food cake has to stick to the pan to rise, so I had to cut every single one out of the pan, then wash the pan before I could bake the next batch. It was worth it for a couple batches because they came out so cute! Besides, they were for my mommy. 🙂

Advertisement

7 Comments

Filed under Cakes

Soft Sprinkle Sugar Cookies

My goal when making these cookies was to mimic an amazing Mrs. Fields cookie I had a couple weekends ago while I was in Tahoe. While these turned out nothing like my beloved Mrs. Fields cookie, they were still so yummy and fun and easy that I had to share!

Soft Sprinkle Sugar Cookies slightly modified from Spark Recipes

Ingredients:

1 1/2 cups sugar

2 sticks (1 cup) of butter

1 egg

1 1/4 tsp vanilla extract

1 1/2 tsp lemon extract

2 3/4 cups flour

1/2 tsp baking powder

1 tsp baking soda

1/2 tsp salt

4 tbsp milk

Directions:

1. Beat butter and sugar until light and fluffy. Add egg and extracts and mix to combine, scraping if necessary.

2. Add the salt, baking powder, and baking soda, then slowly add the flour 1/2 cup at a time. Once fully combined, slowly add the milk.

20130419-142832.jpg

3. Scoop dough into approximately 1″ balls. I used my small cookie scoop. Roll the tops in sprinkles (I used jimmies) and place 2 inches apart on a parchment or silicone lined baking sheet.

20130419-142844.jpg

20130419-142837.jpg

20130419-142850.jpg

I went a little crazy with the sprinkles.

20130419-142856.jpg

4. Bake at 350* for 10 minutes, then let cool completely on the cookie sheet. The centers will be soft so you want them to set before trying to move them.

20130419-142904.jpg

My husband loved these! As did my coworkers and ex-coworkers. The batch made about 5 or 6 dozen, so I had plenty to share!

2 Comments

Filed under Cookies

Red Hot Cinnamon Popcorn

This wasn’t the most successful idea I’ve ever had, but it still worked so I wanted to share!

I made red hot cinnamon flavored kettle corn.

I mixed together oil, oil flavoring (cinnamon) and oil candy coloring in a large pot. Set it on high and dropped a few popcorn kernels into the oil.

20130419-142803.jpg

Normally, when the oil gets hot he popcorn kernels pop and then we add the rest of the popcorn… That’s still what I did, but it was smoking like crazy the whole time. Once the kernels popped I dumped in the sugar and rest of the kernels, stirred as much as possible, and put a lid on it to begin shaking. It was smoking so much I had to crack the lid a few times to let the smoke out, but the kernels were still popping so I kept going.

Once the popping slowed, I pulled off the lid and dumped the popcorn on some wax paper across the countertop. Surprisingly, nothing was burned! And it was a pretty pink color from the red coloring I added.

20130419-142811.jpg

Now for the taste… At first it just tasted like kettle corn but without the salt. Then I kept eating… And the cinnamon snuck up on me ad I could feel it slightly burning my tongue!

20130419-142816.jpg

The smoking was weird, not sure if t was from the flavoring or the coloring added to the oil, but I’d say overall it was a success! I was scared to add too much cinnamon oil, but it was so subtle that I think I will double it next time!

2 Comments

Filed under Candy

Superhero Treats

Alex just turned 3! Last year he had a circus themed party (last year’s treats can be seen here).

I have to share the invite for the party, it’s just too cute! It was also the inspiration for the cookies.

invite

I made cupcakes of all different colors with superhero toppers…

20130410-101005.jpg

And cookies as favors for the guests (who all dressed up as superheros!).

20130410-100957.jpg

For the cookies I played around on the computer until I found 3 different fonts I liked. Then I just eyeballed it as I piped on the words. The black makes them pop against all the bright colors.

Here is a picture of them all set out at the party. The big cake in the middle was made by Alex’s mama (so cute!).

20130410-101024.jpg

1 Comment

Filed under Cakes, Cookies

2 Years!

Today is my 2 year Blog Birthday!

Unfortunately I have been too busy to make anything special, even for myself. This photo I found on google will have to do. 🙂

happy-birthday-ornament-backgrounds-wallpapers

Thank you everyone who stays with me and reads about my creations. I appreciate you all!

3 Comments

Filed under Uncategorized

Pregnant Lady Cookie Dough

This is actually just a post rewind of sorts… bear with me.

…the other day, my husband said I should make chocolate chip cookies. Cookies are basically his favorite thing ever. (And I don’t mean my decorated sugar cookies. He likes regular ol’ cookies.) Me being the hormonal, whiney, cranky-pants that I am lately, protested because A) I would have to make cookies, and B) I couldn’t eat any dough.

See, people always say you shouldn’t eat raw cookie dough or cake/brownie batter because the raw eggs and salmonella blah blah blah… and no one actually listens to that.

tumblr_lx04v3YdKv1r69opoo1_400

BUT. When you’re prego, salmonella is a really big deal. Like it can cause miscarriage big deal. So I wasn’t even trying to tempt myself.

Thankfully, I had these Cookie Dough Truffles up my sleeve. Raw cookie dough sans eggs. I will now refer to it as Pregnant Lady Cookie Dough.

(**Quick note: While this satisfied my cookie dough need, it didn’t quite satisfy my husband’s cookie need. You can’t bake dough without eggs, it just won’t work! I think I owe him…)

When I posted the original recipe, I coated them in chocolate. I’ve made this dough a few times now, and most of the time it doesn’t make it to the dipping stage. Usually I bake it into something. This time, no way.

I scooped the dough into small balls, lined them up on a wax lined baking sheet, and left them in the freezer overnight. The next morning, I packed them all in a quart-sized zip top bag and gifted them to my brother-in-law for this birthday. He’s a cookie dough fiend.

…not all the dough made it into cute little balls. The rest resided in my fridge until we polished it off last night. 🙂

20130403-083615.jpg

To make things easy, here is the recipe again, appropriately renamed:

Pregnant Lady Cookie Dough – adapted from eat.drink.smile. 

1 cup (2 sticks) butter, room temperature
3/4 cup granulated sugar
3/4 cup packed brown sugar

2 tsp vanilla
scant 1/3 cup milk (little less than 1/3 cup)

2 1/2 cups all purpose flour
1 tsp salt
1/4 tsp baking soda

1 cup semi-sweet chocolate chips (I used reg size but mini would work!)

Directions:

1. Beat together butter and sugars until combined.

2. Add vanilla and milk and beat, scraping and cleaning beaters/paddle a couple times.

3. Mix together flour, salt, and baking soda, then slowly add to wet mixture until completely combined.

4. With a wooden spoon or spatula, stir in the chocolate chips.

5. Scoop into small balls and freeze on a baking sheet. Once solid, store in a zip top bag for anytime snacking.

Pregnant ladies everywhere, you’re welcome.

2 Comments

Filed under Misc