Monthly Archives: June 2013

Masquerade Cookie Pops

These are in the running for my favorite cookies I’ve ever made.

An old coworker asked for cookies for a Masquerade themed party. My husband suggested putting them on sticks as cookie pops so that they would be more realistic as masks. What a perfect idea!

I made them extra thick to hold up on the sticks, then iced them with a similar technique as these Fall Leaf Cookies. Except this time I couldn’t dunk them in a bowl because of the stick, so I had to work on a flat platter instead.

20130615-072056.jpg

Each cookie came out completely unique in color and swirl.

Once they were dry, I piped white designs on them. I love the way the white popped against the bright colors. Each one had a unique design on it as well, because I just “winged it” for each one.

20130615-072103.jpg

20130615-072108.jpg

20130615-072114.jpg

20130615-072119.jpg

20130615-072124.jpg

Once they were all ready, I bagged them individually to be given as favors. I’m so glad she liked them as much as I did!

20130615-072130.jpg

Advertisement

5 Comments

Filed under Cookies

Little Lady Baby Shower Cookies

A photographer friend of mine wanted some cookie favors for her sister’s baby shower. It’s going to be a girl, and the theme was “Little Lady.”

Here’s the invite, isn’t it adorable?!

Anyway, her and I agreed to do a “service swap” and she will be doing my maternity photos in a few weeks when I feel good and BIG. 🙂

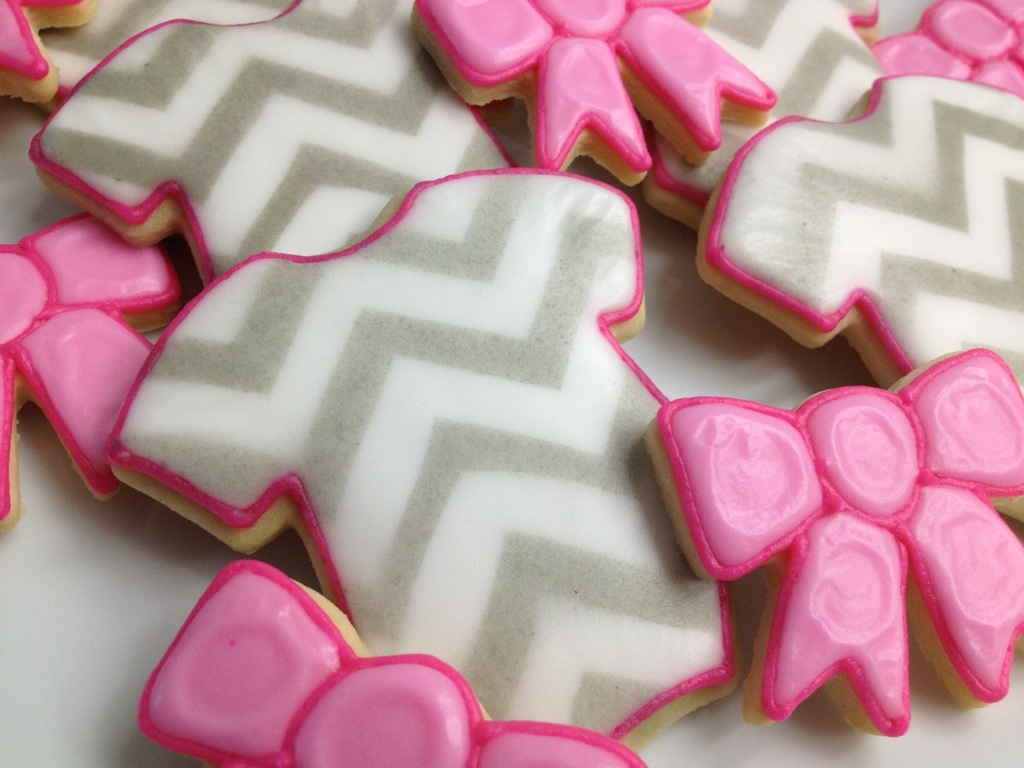
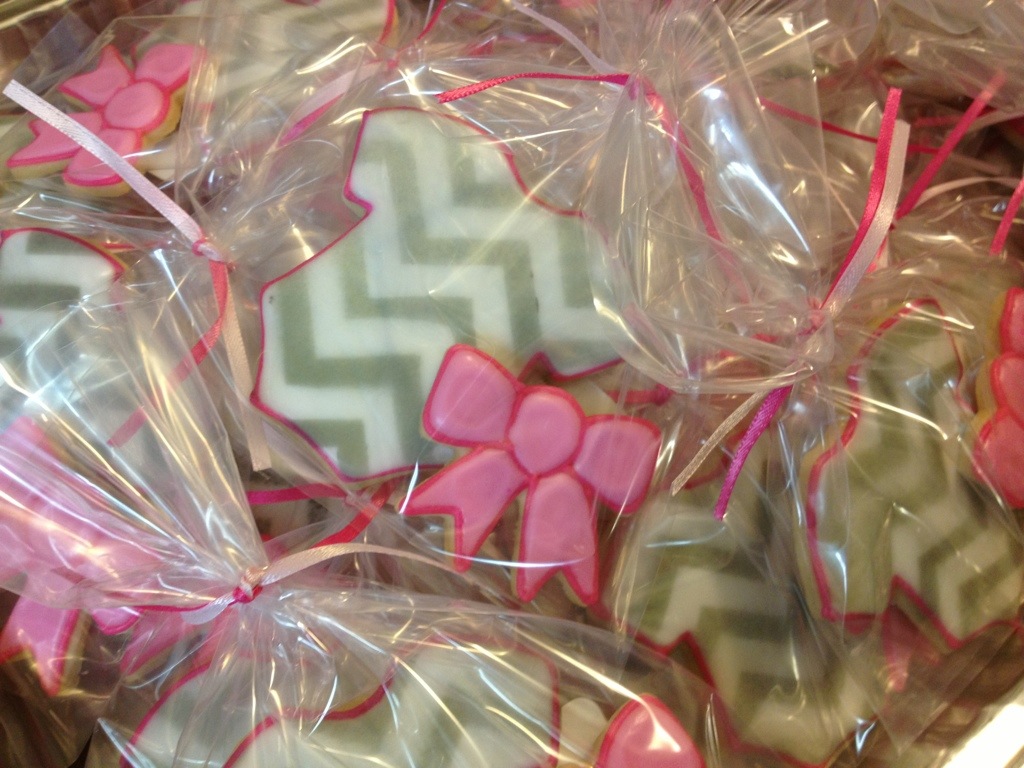
We decided to do chevron on some onesies, and pair them each with a perfect little pink bow. I’m obsessed with my little bow cutter!

20130612-123922.jpg

I debated how to do the chevron design, because I wanted it clean and not a ton of outlining throughout. Especially since I outlined in pink. I decided the best route would be to go with a stencil.

20130612-123906.jpg

Unfortunately, I could not find a stencil! If I had planned ahead I would have just ordered one online, but seeing as chevron is so “in” right now, I thought I wouldn’t have a problem finding one.

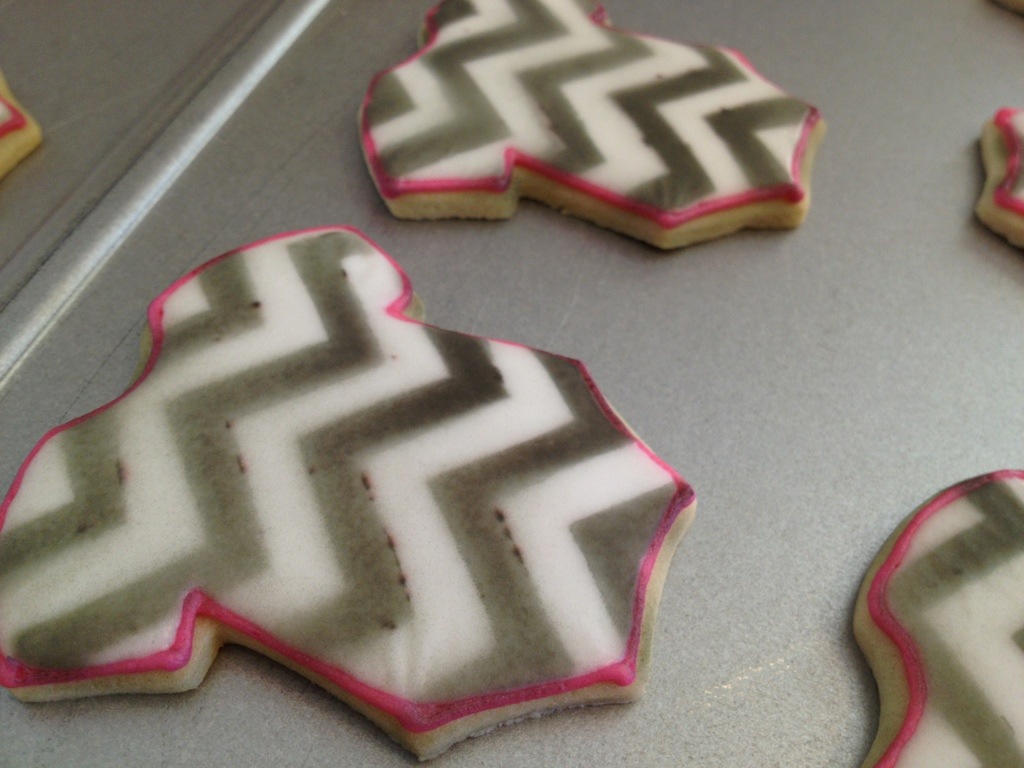
I ended up buying stencil templates and making my own. I found a pattern online and printed it out, and my wonderful husband cut it for me with an x-acto knife.

20130612-123913.jpg

Then I just laid it across the cookies and sprayed it with Wilton color mist. Since the stripes had to be grey, I used black color mist and just did a light coat. (Obviously if you have an airbrush that would be better.)

Turned out better than I thought! The key was to spray exactly downward, and not at an angle – otherwise the spray snuck under the stencil and the design got a little blurry.

20130612-123932.jpg

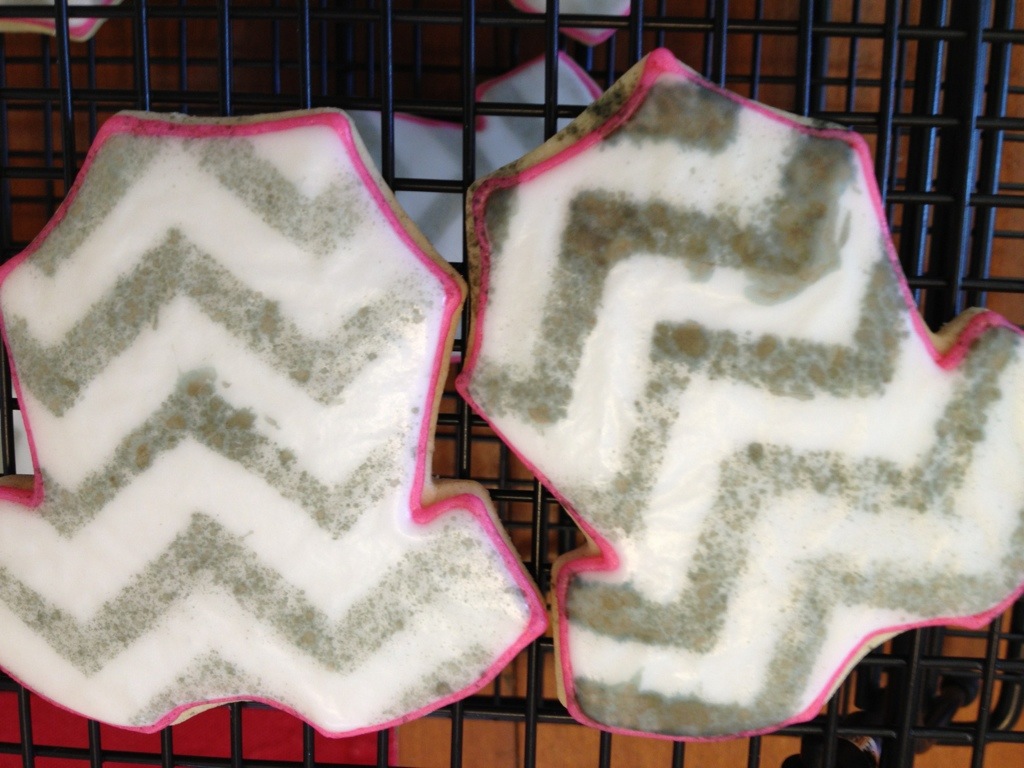
Here are a couple that I sprayed a little too much and got too dark…

20130612-123959.jpg

And these are the last 2 that I did… the spray was running out and it started to get blotchy and messy on my poor cookies. Luckily I had made extras, so these were eaten. 1 can of color mist will cover about 50 3″ cookies like this. I’d say if you are doing exactly 50, opt for the 2nd can. You don’t want to end up with this at the end!

20130612-124006.jpg

Here are all the cookies bagged up and ready to go for the party!

20130612-124012.jpg

**A few other tips if you’re going to try this:

– Either do it outside or clear a large space. The mist gets everywhere. I’ve done it outside and it was windy and that wasn’t ideal either. Pick your battle I guess.

– Every 2-3 sets of cookies, wash and dry off the platter and stencil. You don’t want leftover smudging the next cookie.

– Make extras so you can test in the beginning, throw out any blotchy ones at the end, and play around with different shades of mist.

4 Comments

Filed under Cookies

Thank You Cookies

I was given free reign to make some simple Thank You cookies for someone. I had been craving summertime, so I went with bright & cheery summer colors.

20130530-111907.jpg

This is another new font I’ve tried lately. I like it because it’s cute and easy without being too cutesy. If that makes sense.

20130530-111922.jpg

4 Comments

Filed under Cookies

Oaty Nutty Chocolate Chip Cookie Bars

I offered to bring dessert to a family BBQ a couple weeks ago, but when it came time to make it I didn’t have much on hand, and didn’t have a ton of time. I searched the internet for ideas and came across this recipe for Granola Blondies by the ever amazing Shelly of Cookies and Cups. I used the idea as a basis for my bars, but none of my fix-ins are the same because I had to use what I had in the pantry!

I wasn’t sure what to call my version, so I settled on a wordy thrown together name that just encompasses everything they represented.

20130522-140939.jpg

Oaty Nutty Chocolate Chip Cookie Bars – adapted from Cookies & Cups

Ingredients:

1 stick (1/2 cup) salted butter

1 1/4 cups packed brown sugar

2 eggs

2 tsp vanilla

2 tsp baking powder

1 tsp salt

1 1/4 cups flour

1 1/2 cups rolled oats

1 cup coarsely chopped walnuts

1 cup chocolate chips

20130522-140801.jpg

20130522-140806.jpg

Don’t all of the fix-ins look amazing together??

20130522-140811.jpg

Directions:

1. Preheat oven to 350*.

2. Line 9×9 pan with foil for easy removal. Spray foil lightly with non-stick spray.

3. Beat together butter and brown sugar until fluffy and creamy. Add eggs and vanilla, and scrape sides if necessary.

4. Add salt and baking powder. Slowly add flour until all incorporated. Mix in the fix-ins by hand.

20130522-140913.jpg

5. Spread into the foil-lined pan and bake for 30-35 minutes or until edges start to turn golden. Let cool completely before cutting. (You can put in the fridge to cool faster.)

20130522-140919.jpg

I didn’t have time to let these cool and set up enough, so they were very very gooey when I cut into them.

20130522-141024.jpg

Still amazingly tasty, but not the cutest pictures or the cleanest fingers. 🙂

1 Comment

Filed under Cookies, Misc